Fall Leaf Suncatchers

I guess it’s finally time to leave the ghosts and witches behind us as we enter into that little span of time between Halloween, Thanksgiving and the onslaught of all things Christmas. Although, truth be told, I didn’t get to accomplish all of the Halloween projects I had up my sleeve.  So if things start to get boring about mid January and we’re tired of being snow-bound, it’s quite possible we’ll be sharing some more spooky crafts.

When I taught elementary art, this was about the time I’d start to focus my young artists back to the beauty of fall and all the amazing colors of nature.  If possible, take your little one on a nature walk as a precursor to this activity.  Point out all the colors you see and the different shapes of the leaves.  You can talk about the change of seasons, weather, and why the leaves turn colors and fall off of the trees.

This is a simple craft that requires no special prep work and only simple materials, and the finished product is very beautiful.  This is also a project that is easy to modify for any age or ability level.  For example, younger children can exercise their fine motor skills by ripping and tearing the tissue paper; older children can practice scissor control by cutting their tissue into little pieces.

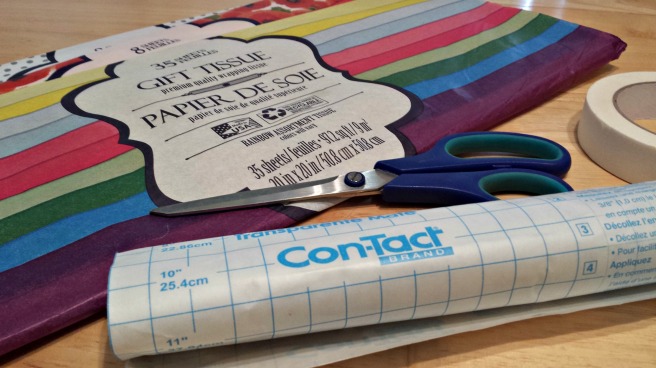
What you will need:

What you will need

  • Tissue paper in fall colors
  • Contact paper
  • Masking tape or other adhesive tape
  • Scissors
  • Washable marker
  • Small container to hold torn tissue pieces

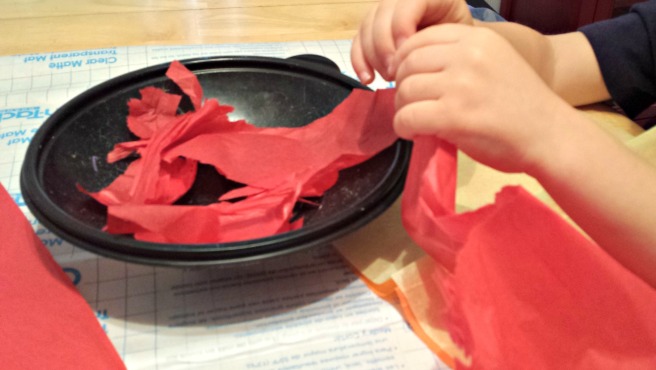
To begin, tear or cut your chosen colors of tissue into small pieces.  If you went on a nature walk you can try to find tissue to match all the colors you saw together.

tearing tissue

When you have enough tissue, set  it aside.  We used a container from the recycling bin to hold it all.
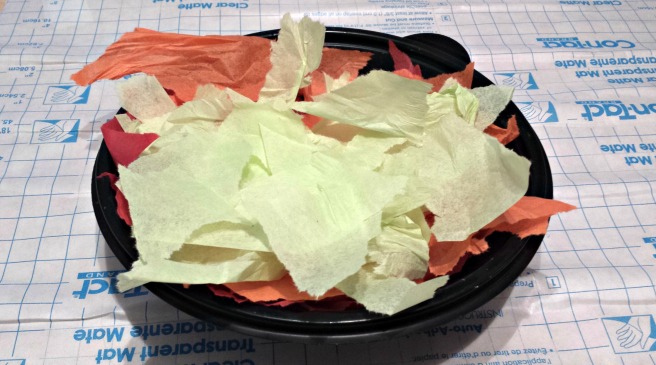
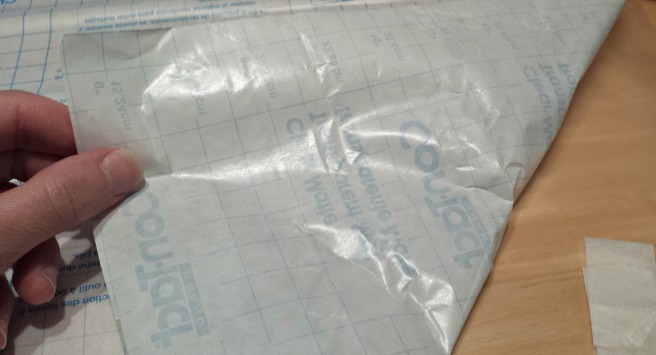
torn tissueNext, cut a piece of contact paper.  I used some masking tape to carefully tape the piece of contact paper to the work surface, with the paper backing side up.  This will keep the contact paper in place as you work.  Once it is secure, carefully peel away the paper backing. The contact paper should now be secured to your work surface, sticky side up.

Peel off the backing

Optional – Attach your contact paper to a window or glass paneled door using the same method, and let your little one work standing up.  This is a good modification for children who don’t care to sit still when working on a project.  You can also enjoy the immediate sun-catcher effect this way.

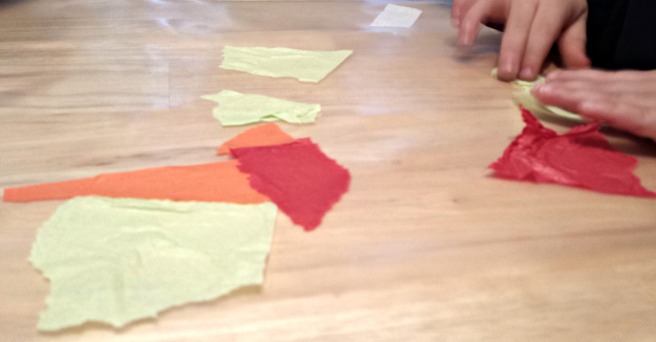
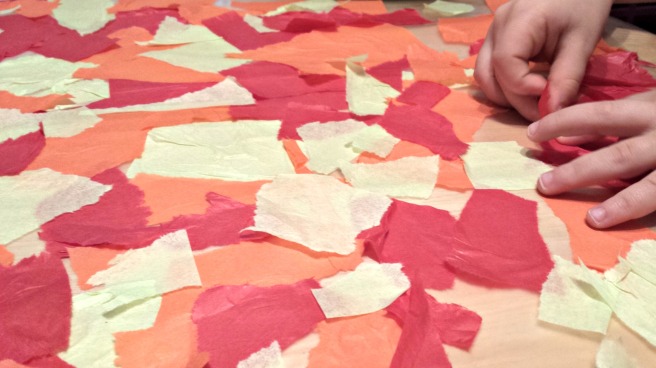
Now it’s time to add the tissue!  I showed my son how to put the tissue on to the sticky surface, and how to press it down gently so it completely sticks to the paper. We also talked about using different colors to fill in the space.  That was all the direction he needed.  He enjoyed sticking the tissue down and spent a bit of time deciding where to put each color.  I helped by filling in tiny spaces with small bits of tissue and tearing more when we started to run low.

Sticking tissue down

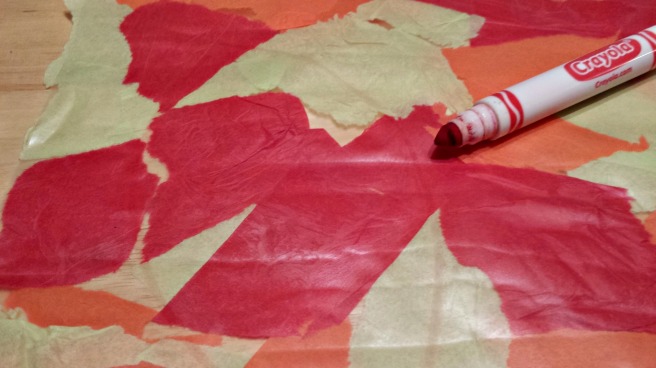
Keep working until almost all of the contact paper is covered.  Younger children will enjoy the simple sensory appeal of sticking and pressing the tissues while older children can work to create patterns or more purposeful color placement.

sticking tissue2

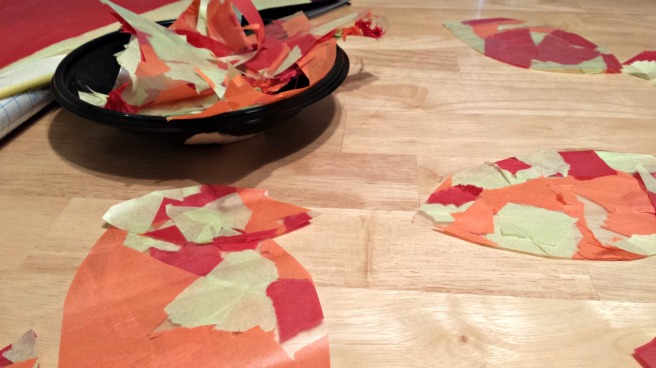
When the contact paper is completely covered, carefully remove it from the table and discard the tape you used to hold it in place.  Flip it over to the plastic side and using your washable marker, draw a leaf shape.  You can free-hand this or Google leaf templates – there are lots to choose from.  I tried to draw a maple leaf from memory – it looked like a misshapen hat.  So if you make a mistake or don’t like the leaf that you drew, use a damp paper towel to wipe off the marker.

Draw the outline

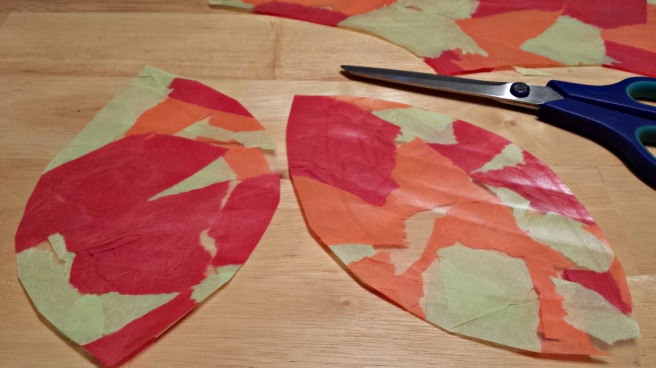
About halfway through drawing the leaves I decided to just cut simple leaf shapes out.

finished leaves

Don’t they look awesome?  You can reserve the scraps in a collage box to use another day.

completed leaves

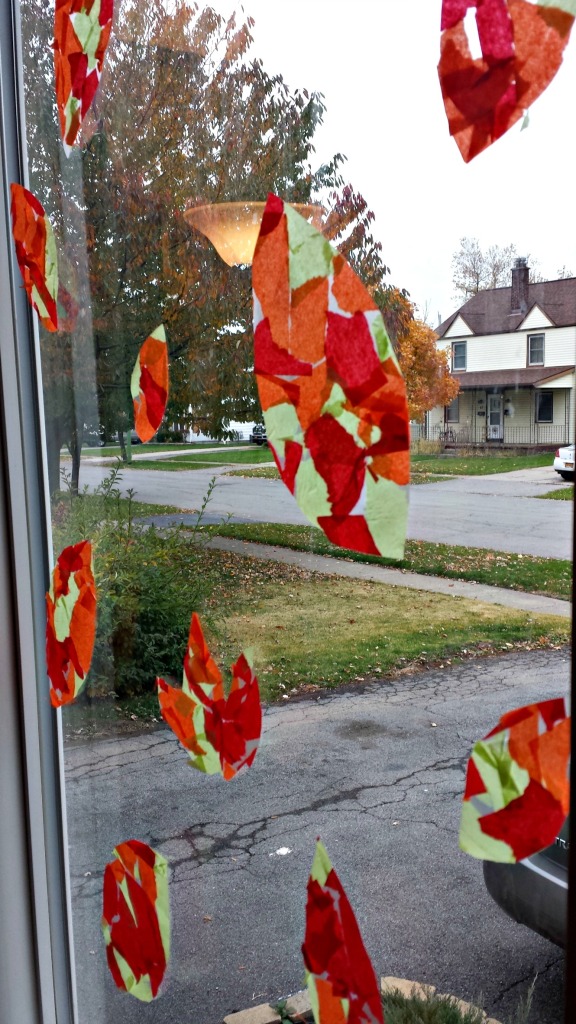
That’s it!  This is a great seasonal project that is pretty much goof-proof and always looks great.  We hung our finished leaves in our front window and they look fantastic.  We have also enjoyed checking to see how they look at various times during the day, depending on how much sunshine there is.

window

This was so much fun to do and easy enough to accomplish even after we were all a bit sleepy from daylight savings time.  I hope you enjoy making your own beautiful Fall Leaf Suncatchers!

K

Zombie Brownies

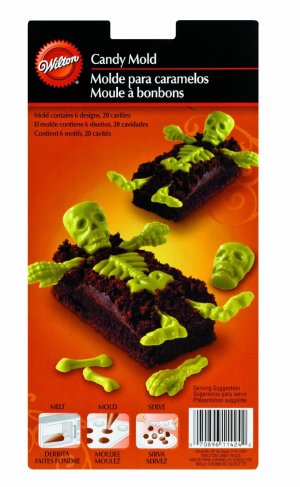
This is another recipe/project that originated when I was wandering around a craft store, as I do.  I noticed this candy mold in the Halloween bake-ware section:

Skeleton candy mold

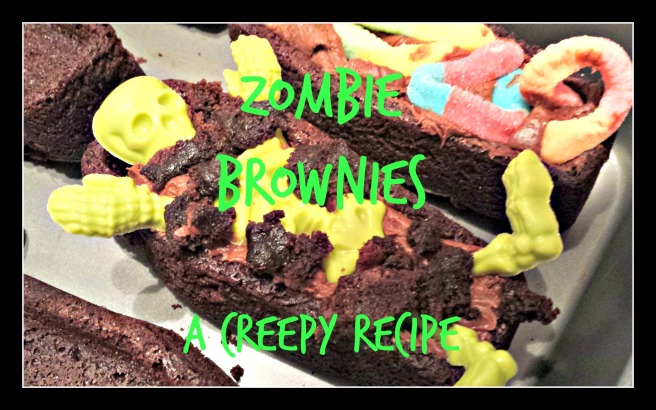
Immediately the wheels started to turn – I had a coffin shaped cookie cutter at home and three half-full bags of colored candy melts leftover from last year.  I bought the mold and went home to do a little research on creating the zombie brownies pictured.  You can find the original project here.  It’s a pretty bare bones (ha ha groan) set of instructions, so I decided not only to try it out but to also put my own spin on it.

This is another project that requires some simple prep work and a few special supplies.  In other words, not a great last minute project.  (If you need a last minute fix, check out the ghost marshmallows at the end of my donut tutorial here)  But if you have a day or two to complete this and some time to assemble your supplies, the end results are pretty awesome.  I have also included some simple variations, so read through and decide what works for you.

What you will need:

  • Skeleton candy mold (from craft store or online)
  • Colored melting candy wafers in color(s) of your choice
  • Brownie mix
  • Chocolate frosting (store bought or homemade if you’re a maniac)
  • Icing/decorator bags or plastic baggies
  • Coffin shaped cookie cutter or coffin shaped bake pan
  • Microwave safe bowl, spoons, spatula, tall glass
  • Optional: red gel icing, gummy critters and Halloween candies, Thriller music set on repeat

To begin, mold your candies.  You will want all your candy prepared ahead of time to simplify the assembly of the brownies.  If you don’t have time (or don’t want to bother) to mold candy skeletons, skip this step and check out the gummy candy options at the end of this post to complete your creepy treat.

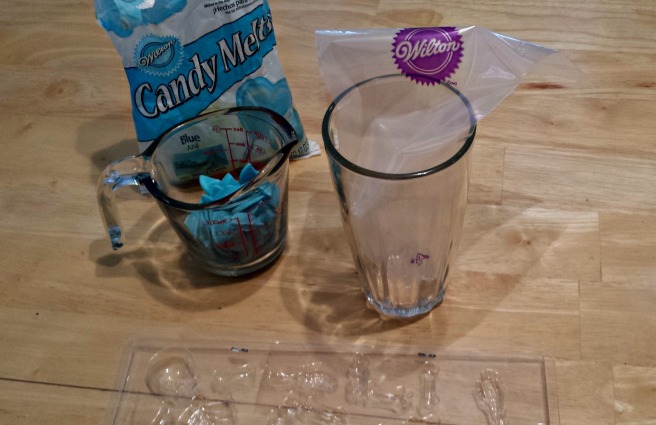
candy melts

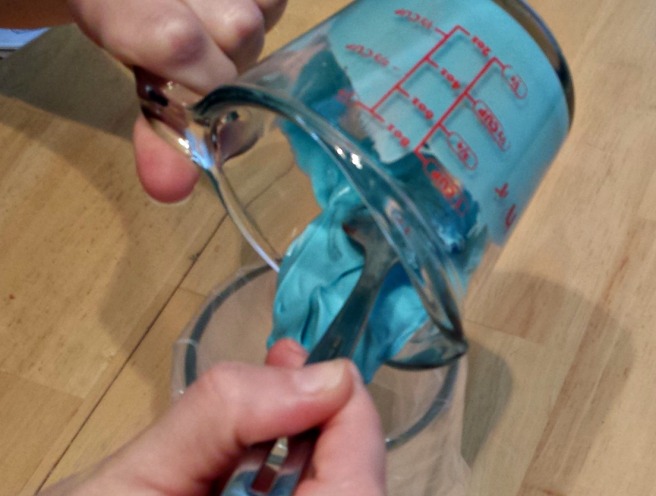
I tested a few different methods for melting and piping the melted candy into the mold, and I ultimately decided to use the icing/decorator bags from my Halloween donut tutorial.  I initially tried adding the melted candy to different kinds of squeeze bottles, but I found that this method inevitably led to air bubbles in the molds and a lot of wasted candy.  I found that piping the melted candy from the bag meant a smooth flow into the mold with no air bubbles.

I did learn a cool trick about squeeze bottles though: To remove melted candy from the inside of the bottle, place the squeeze bottle in the freezer for ten to twenty minutes, or until the candy is hardened.  Then simply squeeze the bottle to break up the hardened candy and shake it out.

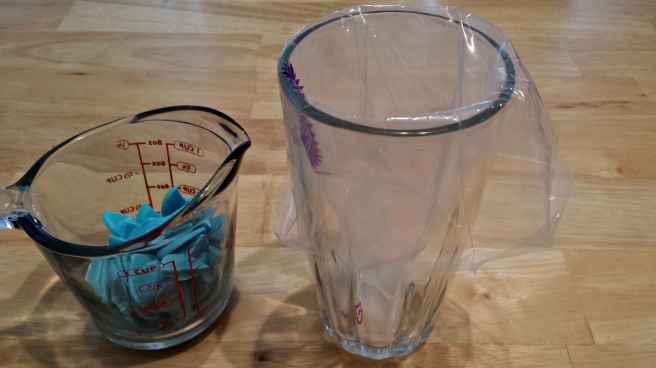
Prep your bag by placing in inside a tall glass, with the pointed end down in the glass.  Roll the edges of the bag down over the sides of the glass.

prep the bag

I use my microwave to melt the candy wafers.  You can also melt them using a double boiler method, and there are warmers you can purchase to safely melt the wafers. Do not melt the candy wafers over direct heat, as they will scorch and become unusable.

I broke the wafers into smaller pieces and placed them in my microwave-safe glass bowl.  I mircowaved the wafers for one minute on 50% power.  Take the wafers out, stir, and repeat until they are completely melted.  Then, using a spoon and spatula, scoop the melted candy into your prepared icing bag.

melted csandy

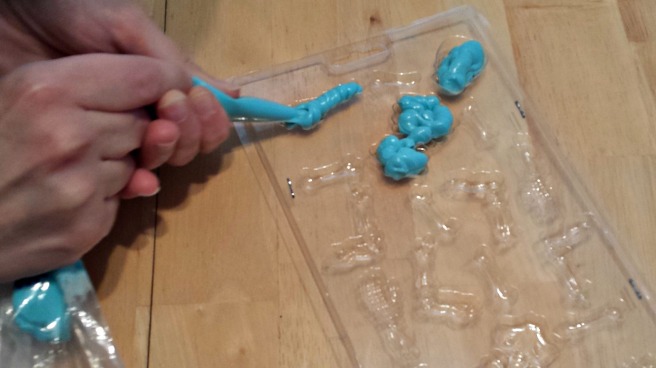
Give the melted candy a minute to cool, then twist the open end of the bag and snip off the tip of the bag.  Begin piping the candy into the mold cavities.  Don’t worry too much about filling the mold exactly – when the shapes are mostly filled, give the mold a few gentle taps on the counter top.  This will help dislodge any air trapped in the cavities, and help the melted candy settle into the mold. Place the mold in the freezer for about 15 to 20 minutes.

piping

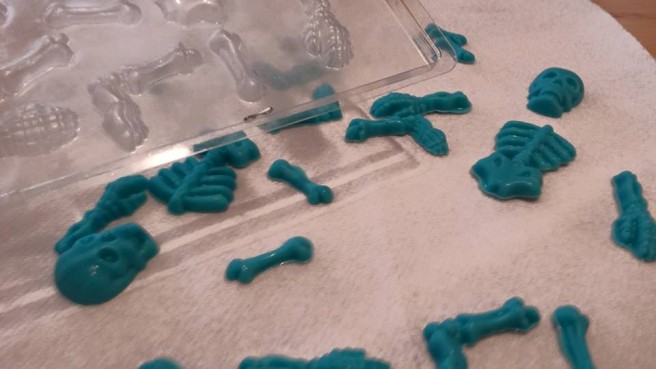
To unmold the candy, place a clean towel on your counter and set the mold on top of it.  Gently tap the mold until the pieces fall out.  Be gentle with the mold; I have found that the brittle plastic can break and splinter if handled roughly.  If some pieces are stuck, rub your thumb back and forth over the top of the mold – sometimes a little heat will help it dislodge.

molded candies

Repeat this process as many times as you like until you have an assortment of candy skeletons to use.

Now it’s time to make the brownie coffins – wow, there’s a sentence I never thought I’d write!   I have tested two methods for doing this, and there are some pros and cons for both.

Method 1 – Cookie Cutter

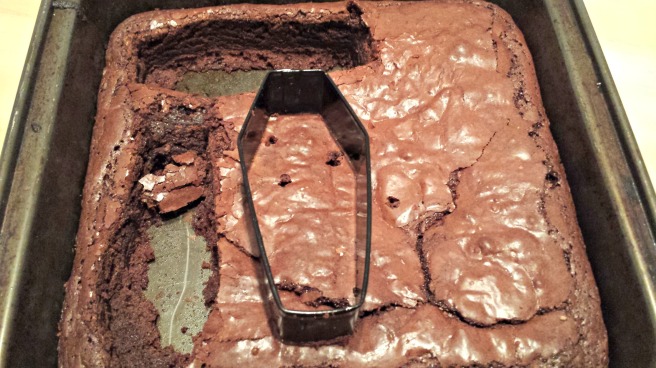
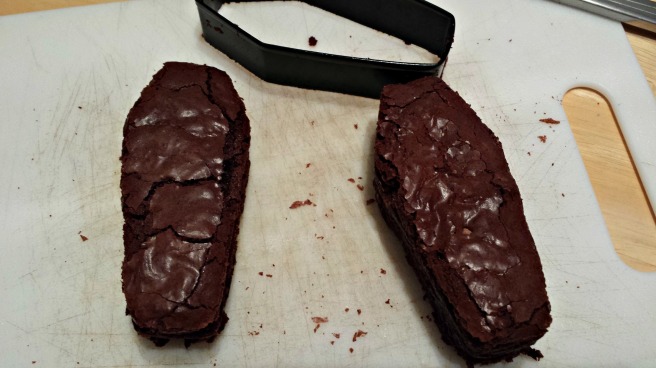
This was my original plan – make a batch of brownies as usual and then use a coffin shaped cookie cutter to cut the brownies.  Prepare your brownies and when they have completely cooled,  use your cookie cutter to cut them into coffin shapes.  Use a butter knife or small spatula to gently lift the brownies out of the pan.

brownie pan

My pan was smaller so my brownies came out quite thick.  I decided to try to cut them in half.  This was sort of successful – some of the brownies cut neatly in half but a few crumbled and had to be eaten (tragedy!)  If you decide to try this, use a sharp serrated knife and go slow.brownies cut

On the pro side of the cookie cutter method, you have lots of leftover brownie bits to nibble on.  Save some, if you can, for the top of your coffins, to look like gobs of dirt.  You can also let your family, who have probably been whining about how good the brownies smell, eat some.  If you want.  Muahaha. Another pro is that this is an inexpensive approach – the cookie cutter cost 99 cents.  A con for the cookie cutter method would be that this is a pretty messy process.

Method 2:  Coffin Bake Pan

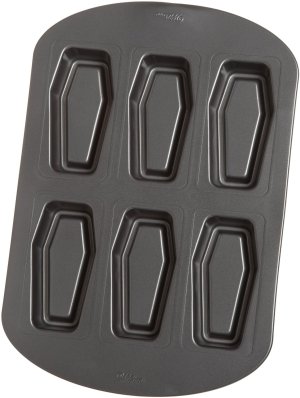
I purchased this cool Wilton coffin bake pan on clearance at the last minute, so of course I had to test it.  This pan makes six LARGE sized brownies, so this is almost a dessert treat to share with two or more people.  The pan creates brownies with a kind of inner shell that you can fill with the frosting or filling of your choice.

coffin pan

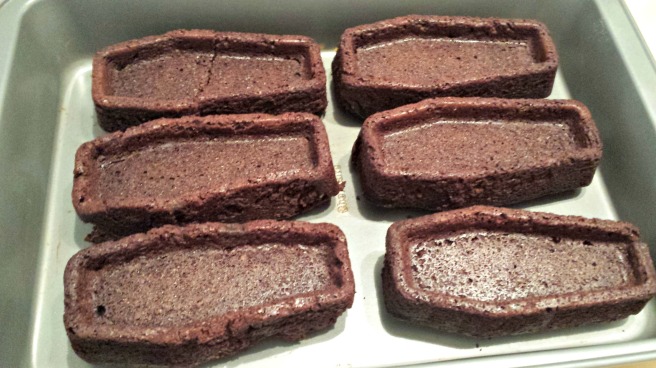
Give your pan a light spritz of cooking spray and bake your brownies at 350 degrees for about 25 minutes.  Invert the pan over a cooling rack and genty tap until the brownie coffins pop out.  Let them cool completely before decorating.

coffin brownies

I told you – these things are huge!  A pro for the bake pan is that this process is much simpler and less messy.  A con, however, is that there are no extra brownie pieces to use for the tops of the coffins.  You could sacrifice one of your coffins to crumble up – and also to snack on.  Another potential con for the bake pan would be the price – I managed to purchase this on clearance for $5.00, but it normally retails for more.

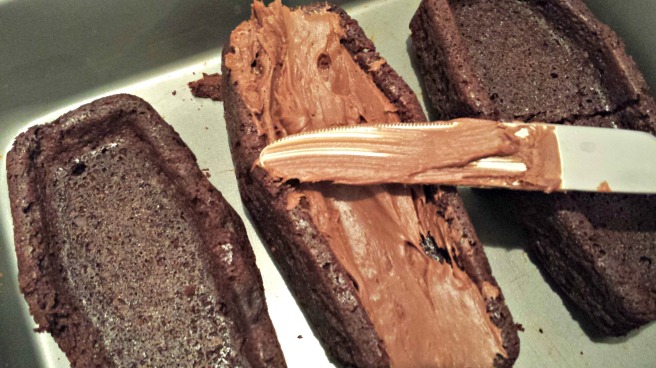
Now the most fun part – decorating!  Whichever methods you used, you should now have some coffin shaped brownies, some candy pieces and some chocolate frosting.  First, add a layer of chocolate frosting to your brownies.

frosting

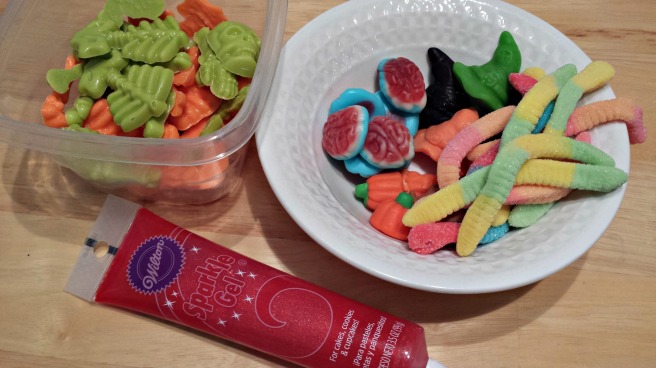
If you check out your grocery store’s bulk section you can find some fun candies to decorate your coffins.  I chose gummy brains, gummy witch hats, gummy worms (a classic!) and some of those weird candy pumpkins that always materialize during Halloween, but no one seems to actually like.  I also got out my red icing gel.

candy

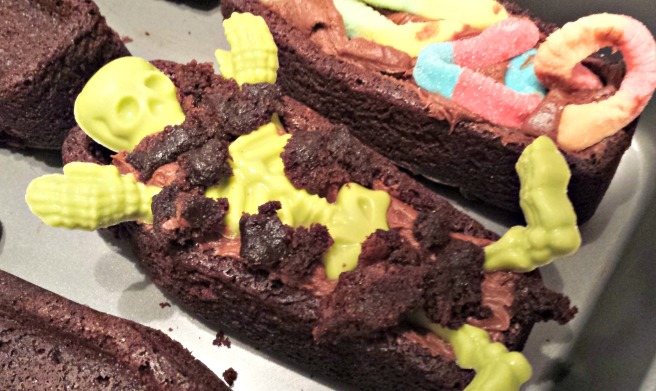
Next, add your candy pieces.  I put our skeletons in first, then added some of the reserved crumbled brownie pieces to the top to look like dirt.

decorated coffins

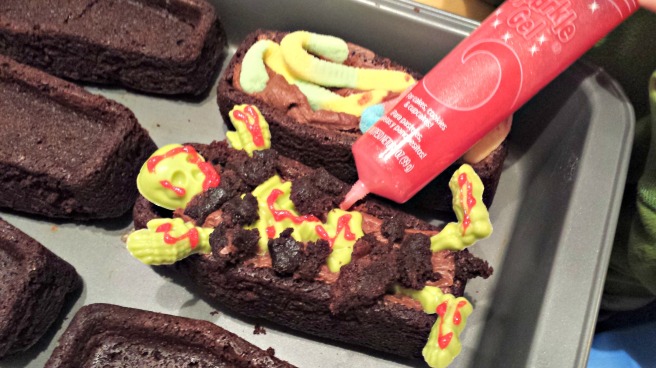
I also added some red icing gel to get that extra creepy, undead look.

red icing

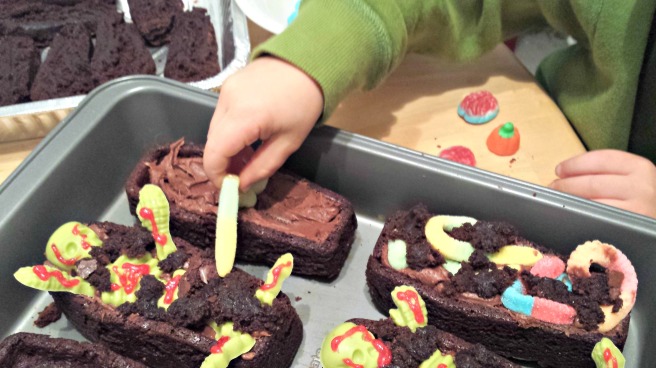
My son had fun sticking the gummy candies into the coffins.  Remember to add some crumbled brownie bits to create that fresh-from-the-grave look.  Delicious!

adding candy

This was a fun recipe with some pretty decadent results. Zombies are still pretty hot right now, so bring these to your next Walking Dead premiere or other zombie-themed event and steal the show.  And if you try the methods outlined above, I’d love to hear how it goes!

K
header

Halloween Donut Recipe and Bonus Ghost Marshmallows

Halloween Donut Graphic

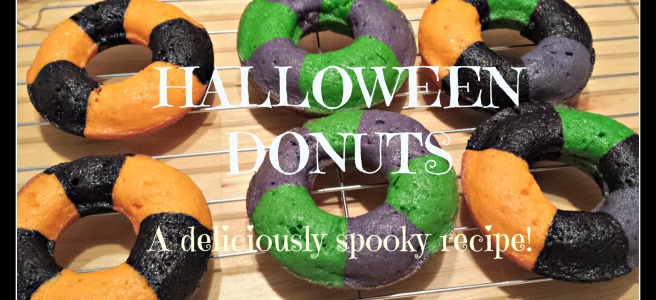
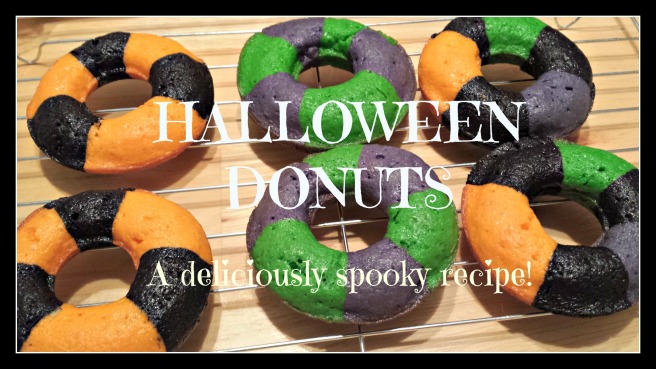
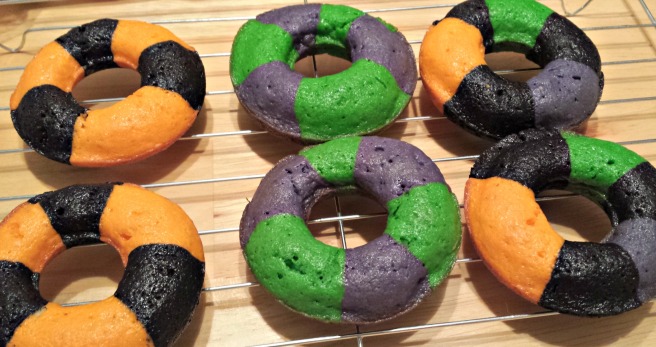
Simply put, these donuts look quite striking.  They remind me of the kind of treat you’d find in one of Tim Burton’s creepy little worlds.  The dramatic orange and black colors should put you in the right mood for some Halloween fun.  My husband wasn’t so sure about adding green and purple at first, but even he agreed the final product looked wickedly good.  Bring these to a school Halloween party (they still have those, I hope?) and watch the little ghouls and goblins’ faces light up.  Serve them at your own Halloween bash or bag them up as a treat for some special trick-or-treaters.  We brought them to our family’s annual pumpkin carving party, and they were a big hit. That said, they’re also good to just munch on while watching a scary movie in your jammies because Halloween.

Halloween Donut and Ghost Mallows 068

These donuts are baked, not fried, and although they are sweet, they’re not overly sweet.  They bake up light and fluffy and very quickly.  Best of all, this recipe can be modified to use any color scheme you like.  Of course we decided to Halloween it up, but you could easily make them in your child’s favorite colors, school colors, or whatever you like.  You can find the original recipe here.  We made rainbow donuts as leprechaun bait last March, and despite my fears that I was about to embark on the latest Pinterest fail, they came out looking and tasting amazing.

The evil secret behind these donuts?  Well, maybe not an evil secret, but definitely a good one.  The secret is: they’re really easy to make because they start with a box of cake mix.  Add some food colors and a donut pan, a dash of Halloween magic and a sprinkle of DIY spirit (ha ha I’ll stop now) and you’re on your way.  This project does require some special prep and supplies, so read everything carefully before you begin.  But by all means, give this recipe a try.

You’ll have everyone marveling at your magic secrets. 😉

What you will need:

Ingredients edited

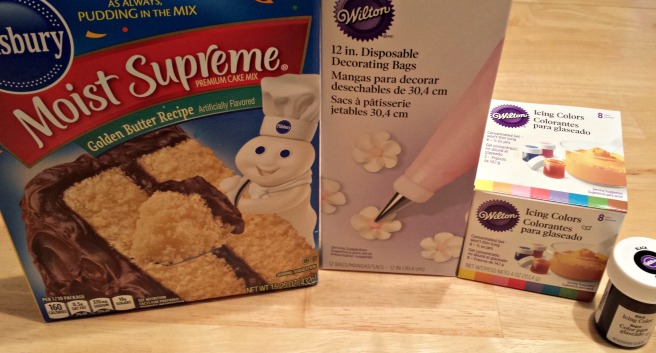
  • A box of cake mix (I used Golden Butter, as suggested in the original recipe)
  • 2 eggs
  • 1 cup of milk
  • 1 stick of butter, softened on the countertop or in the microwave
  • Food colors of your choice (we used black, orange, green and purple)
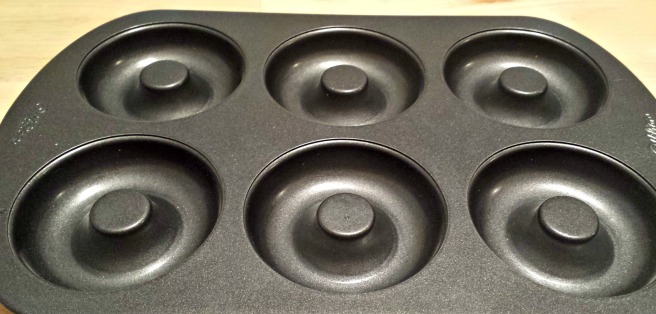
  • A donut pan (available at most craft stores)
  • Icing bags or plastic baggies
  • Bowls, spoons and toothpicks
  • Tall cups or mugs – one for each of your colors

Preheat your oven to 350 degrees and lightly grease the donut pan.  A quick spritz of cooking spray will do.

donut pan edited

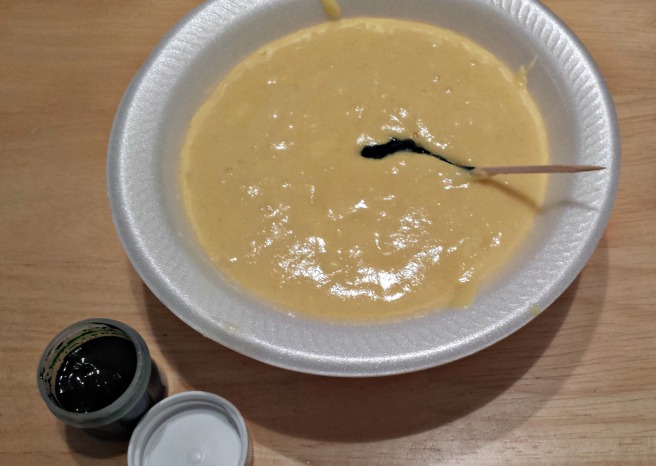
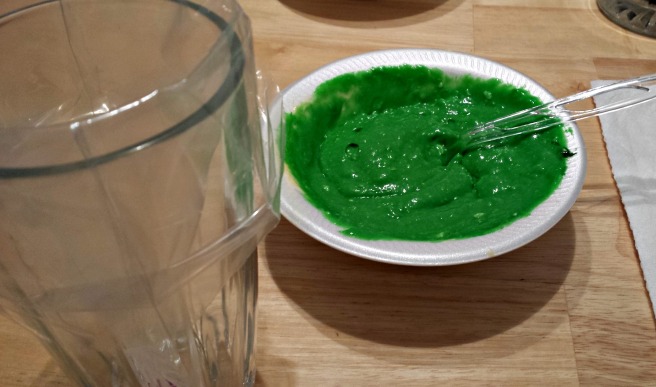
To make the donut batter, mix the cake mix, eggs, milk and butter until blended.  Divide the batter into four smaller bowls and tint each batch with one of your food colors.  I use the gel colors, so I dip a toothpick into the color and swirl it into the batter. Add more color in this manner until you get the intensity you like. Use a new toothpick each time so you don’t get batter in your food color jar.  Repeat the process for each color you wish to use.

add green color edited

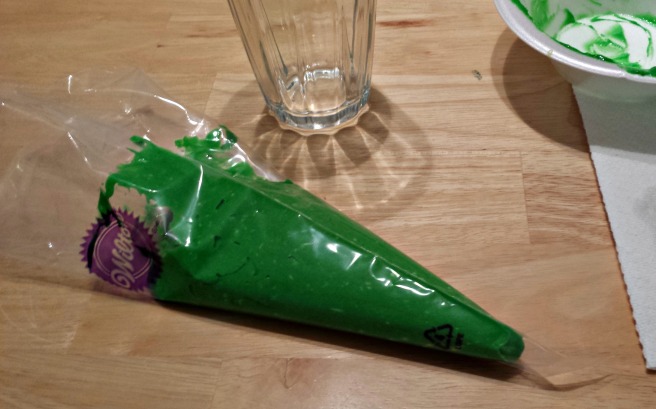
I used icing/decorator bags for this next step, but you could also use a plastic baggie.  I place the bag with the pointed side down into the cup, and fold the edges of the bag over the sides of the cup.  Scoop all of the batter into the bag.  Roll the edges of the bag back up, and give it a little twist.  I place the bag, uncut, back into the glass.  Repeat for all your colors.icing bag edited

icing bag edited 2

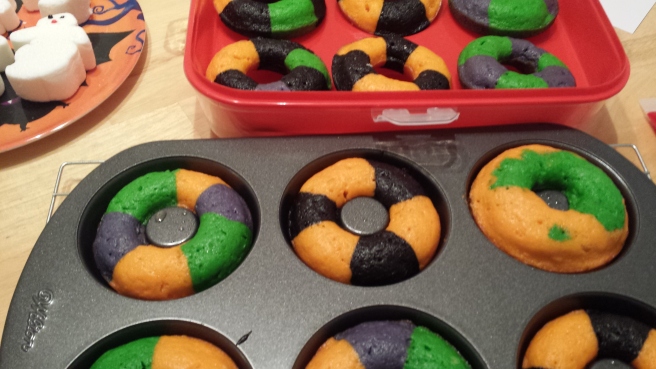
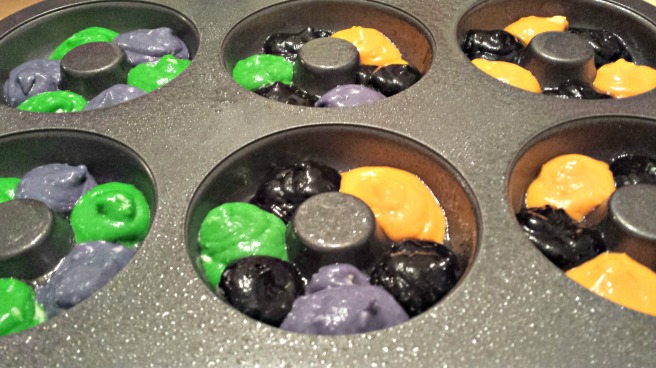
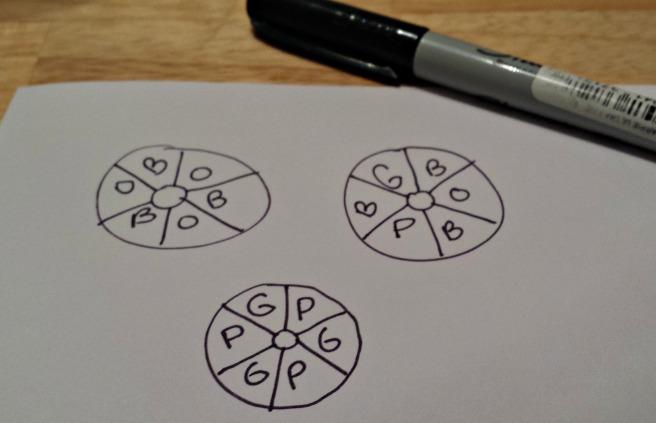
When all of your colors are ready, snip off the ends of the bags, and squeeze a small blob of batter into the donut pan.  You can do this randomly with different colors until the well is full, and you get a swirly, kind of tye-dye looking donut.  You can also arrange your colors in a pattern.  Me being me, I planned out my patterns.

pattern edited

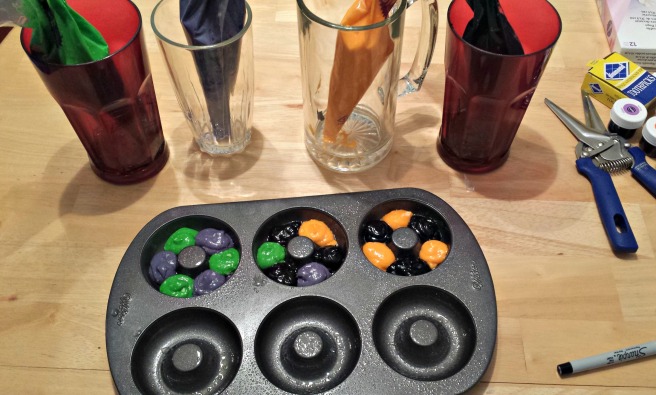
Continue filling in all of the donut wells.  When you are finished with a color, place it back in it’s cup or mug.  I found this helps keep your work space clean and prevents batter from getting all over.  My donut pan has six wells, and this recipe made enough to make three trays of donuts.  I probably could have gotten a fourth tray had I really scraped all batter out of the bags.

workspace edited

full pan edited

Bake in preheated oven for about 7-10 minutes.  I checked my donuts around eight minutes.  If in doubt, use the toothpick test: if a toothpick inserted into the donut comes out clean, they’re done.

I gently tap my donuts out onto cooling racks to cool.  As soon as the tray is cool, give it another quick spritz of cooking spray, and then start piping more batter into the wells.

And that’s it!  Delicious, delightful and so impressive, these donuts are sure to please.

cooling donuts edited

Bonus Ghost Marshmallow Project

donut ghost edited

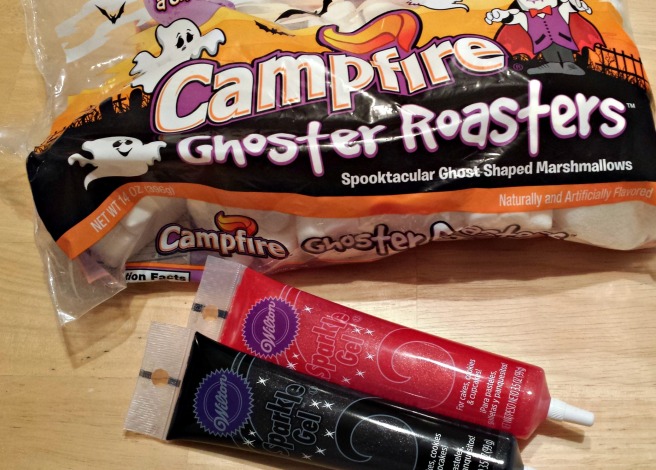
This happens sometimes: I’m in the grocery/craft store (one of two places you are sure to find me) and I see something that sparks my imagination.  I was in the bulk aisle of my favorite grocery store when I spotted these large ghost marshmallows.  The wheels in my mind started turning – what could I do with them?  I decided to grab a bag, and when I got home, I dug out my sparkle icing gels.  Because what makes icing better?  Sparkles of course!

ghost mallow edited

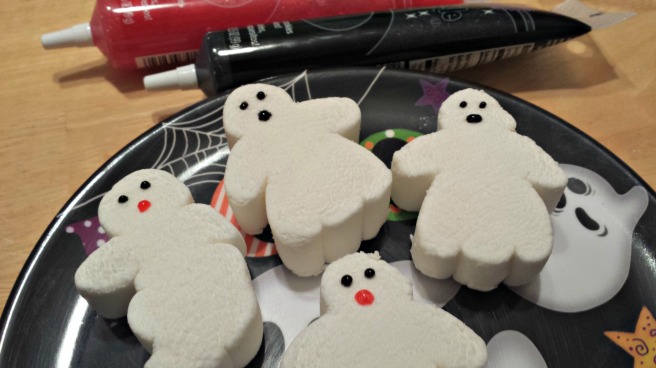
This little project couldn’t be easier.  Set out your little ghosties and pipe on the eyes and mouths.  You only need a little dab of gel icing, and it sort of sinks into the marshmallow.  This took about five minutes total, and they look awesome!

mallow close up edited

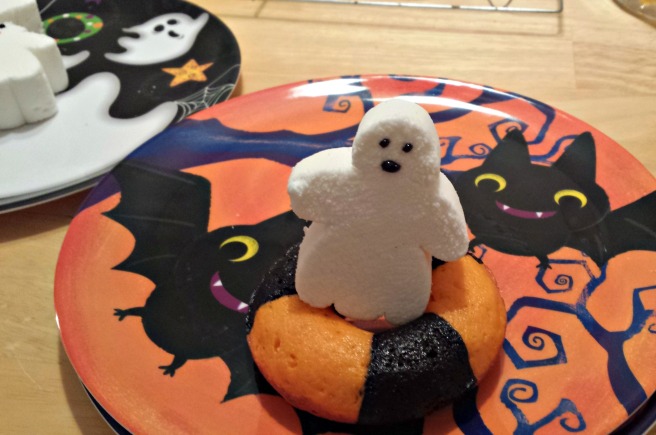
If you’re pressed for time, these would make great cupcake toppers. Stick one on top of a pudding cup and add some crumbled up cookies crumbs and you have an instant spooky snack.  We stuck a few on top of our donuts for an extra special treat.  Or just set them out on a plate and watch them disappear. Boo!

Halloween Donut Graphic I hope you enjoy making our spooky treats this Halloween.  Maybe we can try this again with red and green donuts for Christmas.  These donuts are so tasty and fun to make you may just find yourself making excuses to make them again and again!

K
Glow-in-the-Dark Mummy Pumpkin

Glow Mummy Pumpkin Icon

I guess we must have mummies on the brain ever since we did our Masking Tape Mummy craft.  So here is tonight’s last minute project: A Glow-in-the-Dark Mummy Pumpkin.  This little guy worked up in about fifteen minutes, and it was a nice wind-down craft after a hectic day.  We used a small pumpkin, but you could easily modify this for any size gourd.

What you will need:

Glow Mummy Pumpkin 004

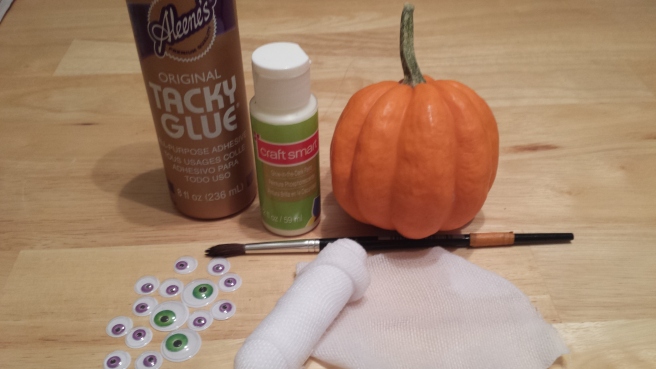
  • A small pumpkin – real or fake
  • White gauze
  • Googly eyes
  • Glue – Tacky glue is pictured, but I had better luck with hot glue
  • Glow-in-the-dark craft paint
  • Paintbrush

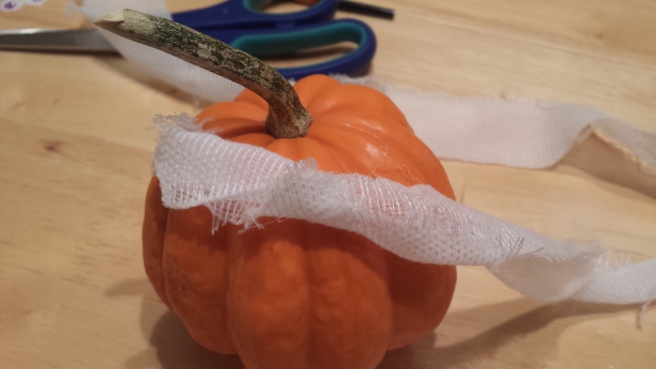
Start by unrolling your gauze.  If your pumpkin is small like the one we used, the gauze might be too large.  We unrolled our gauze and cut it into two long strips, which also gave it a nice, raggedy look.  Start by gluing the gauze to the top of the pumpkin.  If you have patience and time on your side you can use regular white glue.  I ended up using hot glue because I have neither.  Ha ha. Sort of.

Glow Mummy Pumpkin 009

Please use extreme caution if you decide to use hot glue with little ones around.  Sometimes when I use hot glue I set up a separate hot glue station in the kitchen.  By the time I walk the project back into the dining room (where the craftiness happens) the glue is dry and cool and safe to handle.  As always, do what works for you.

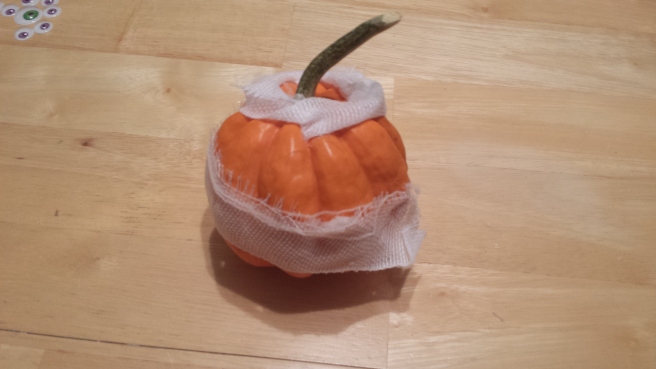
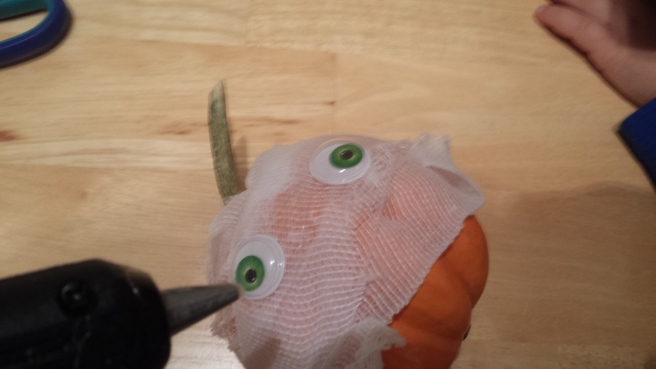
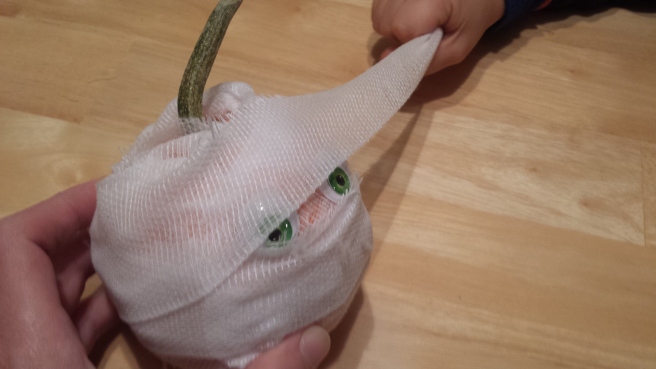
Once your gauze is glued in place, start wrapping it around the pumpkin.  There are some different approaches to this – we found it was fun to turn the pumpkin while holding the gauze, but it worked a little better to wrap the gauze around the pumpkin.  It was also helpful to use glue to tack some of the pieces of gauze in place.  We wrapped it around until we had used about half of the gauze.  Then we glued the eyes in place and continued wrapping.
Glow Mummy Pumpkin 010

Glow Mummy Pumpkin 011

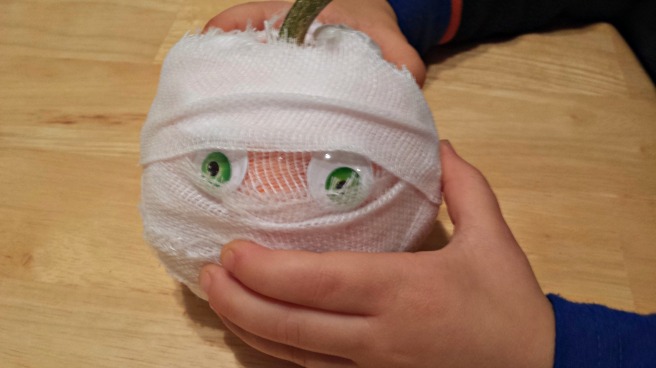
After the eyes are glued down, we wrapped the next few layers so that the eyes were peeking out between the gauze.  By this point we had almost completely wrapped our little mummy up.  When you are satisfied with the wrapping, use a little bit of glue to tack the end of the gauze down.

Glow Mummy Pumpkin 013

Edit Glow Mummy Pumpkin

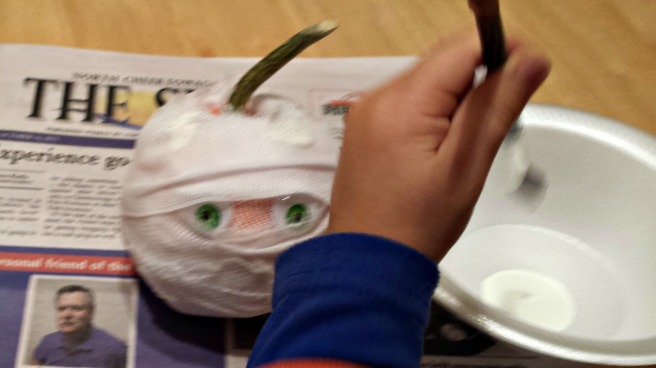
You can stop here, but I had recently purchased some glow-in-the-dark paint that I was itching to try out, so we grabbed a  paintbrush and started dabbing the paint all over the mummy pumpkin.  The gauze really soaks the paint up, so be prepared to use quite a bit.  We had fun turning out the light and deciding where we needed more paint.

edited hand

Glow Mummy Pumpkin 020

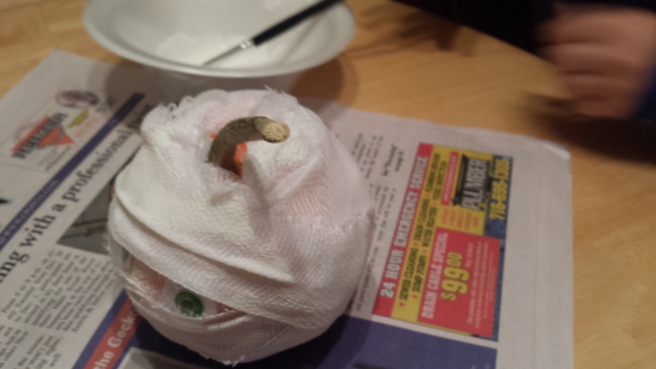
Don’t forget to paint the back side!

Glow Mummy Pumpkin Icon

That’s it!  Turn out the lights and enjoy the glow!  I think this is a great alternative to carving pumpkins, and a mummy pumpkin family would be a fun project for a Fall afternoon – or a wind-down, end of day activity.  Enjoy!

K
Spooky Foam Dough

I love play dough.  It’s one of my all time favorite sensory materials and it is my go to activity for rainy afternoons.   If you have a batch of play dough stashed away, then you have a quick-to-prep activity that engages little minds and delights the senses.  There’s something so relaxing about rolling a ball of scented play dough in your hands – don’t be too surprised if you find that you’re the one requesting a play dough play session!

Play dough is simple to make, easy to customize for any theme you can think of (Outer space! Fall!  Birthday cake!) and it lends itself to open-ended and imaginative play.  It’s a delightful alchemy of science and imagination, process and product.  And since we’re in the midst of all things Halloween, we created a few batches of spooooky foam dough.

Cropped Header

That said, this is not a traditional play dough recipe.  A lot of the fun here comes from making the dough itself.  If you’re looking to model little figures or animals or make hand-print keepsakes, this is probably not the recipe for you.  But if you’re interested in creating a fun sensory dough that is it’s own experience, give Spooky Foam Dough a try.

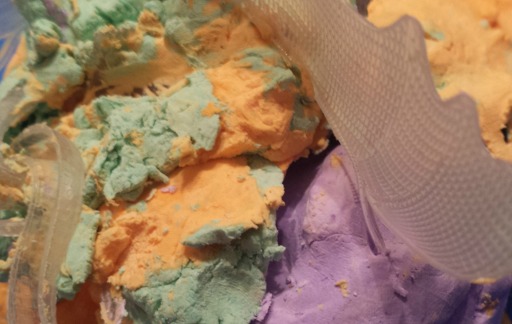
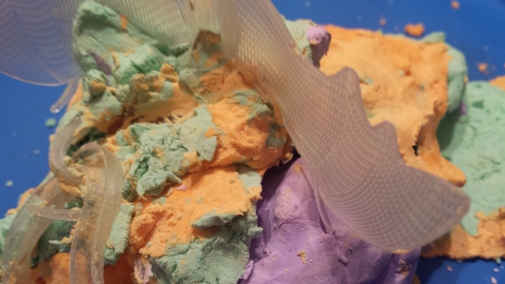
This dough is pretty incredible stuff.  It has the most amazing textures – it is stretchy and squishy and puffy and fluffy and poofy.  It deserves it’s own special word – ploofy.  This is a very ploofy dough.  This is also a very MESSY project, maybe one of the messiest things we’ve ever made.  If the weather is nice, you might want to try making this outside in a large plastic box. Otherwise, just take a deep breath and have fun.  It was quite messy, but clean up was simple and didn’t take long at all.  I also recommend preparing a large bowl filled with warm water, and setting some towels or wipes aside. That way, if you need to wash your hands, you can swish them in the bowl and not get wonderful, ploofy dough all over the faucet handles 😉

Halloween Foam Dough 008

What you will need:

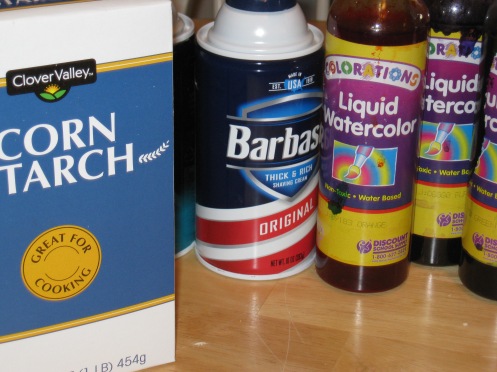
  • Corn starch
  • Foam shaving cream
  • Liquid watercolors or food colors
  • Bowls and spoons for mixing
  • Spooky accessories – we used little plastic snakes, rats and bats

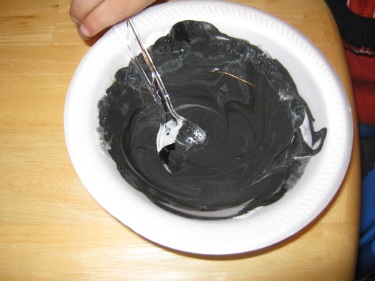
For our spooky foam dough we wanted to make a few different Halloween colors. We originally chose orange, black, green and purple.  Sadly, I chose to try black tempera paint to color the black dough, and while it initially made a lovely, charcoal black dough, it quickly fell apart in crumbly bits.  We couldn’t salvage it, so we decided to move on to our other colors.

Halloween Foam Dough 017

I pulled out my trusty Liquid Watercolors, which I love for hands-on projects, since they create beautiful, vibrant colors and are soap and water washable. They’re also pretty concentrated – you don’t need much to ramp up the color!

You can substitute food colors for the watercolors, but be aware that they may stain hands or clothes.  If you like colorful sensory projects, you may want to invest in your own set.  I only purchased the rainbow colors, so now I may need to go back and get the black (and brown and silver and gold…) colors too.  Check them out here.

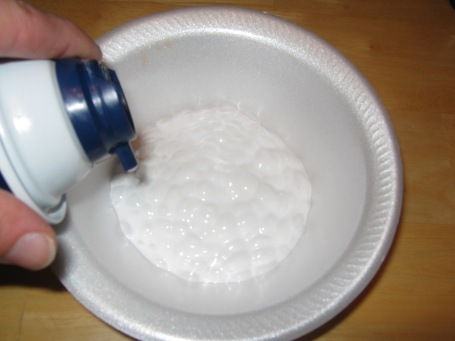
Start by pouring some shaving cream into your bowl.  One interesting thing we learned from this project is that there are a lot of factors that affect the dough.  The first can of shaving cream we used was almost empty, so it came out more soupy than foamy.

Halloween Foam Dough 012

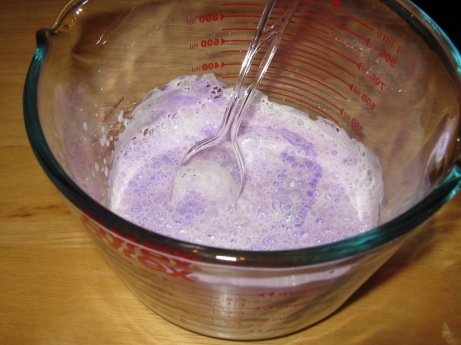
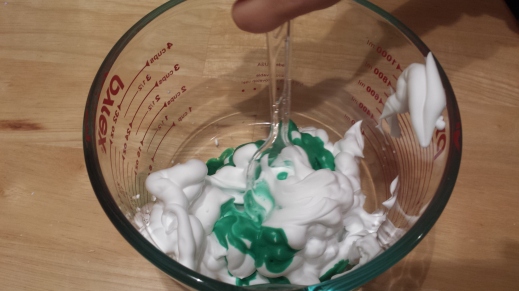
Next, add your desired color to the shaving cream.  Stir well with a plastic spoon so that all of the color is mixed in.  You can always add more, drop by drop, until the color is as intense as you want.

Halloween Foam Dough 021

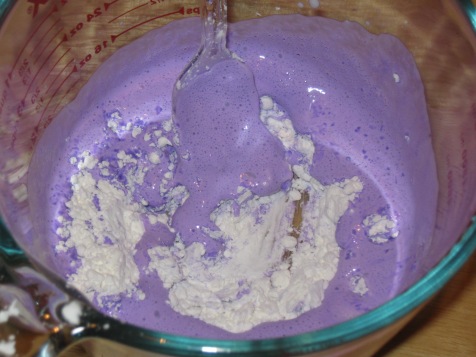
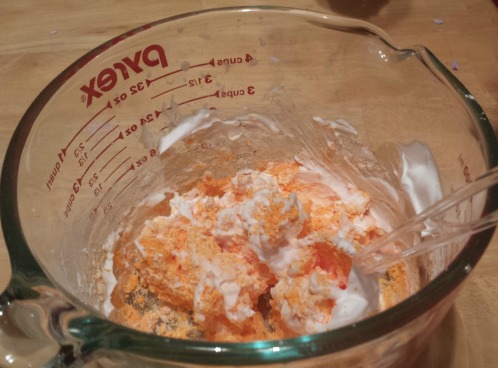
Once your shaving cream is the desired color, add your cornstarch a little at a time and start mixing.  The recipe works in a basic one to one ratio of shaving cream and corn starch, but be ready to keep adjusting the dough.  Add more corn starch if it seems too wet or sticky, and add more shaving cream if it becomes too crumbly. This could be a great experiment for kids –  ask them what they need to add to get the right consistency and let them try it out.

Halloween Foam Dough 025

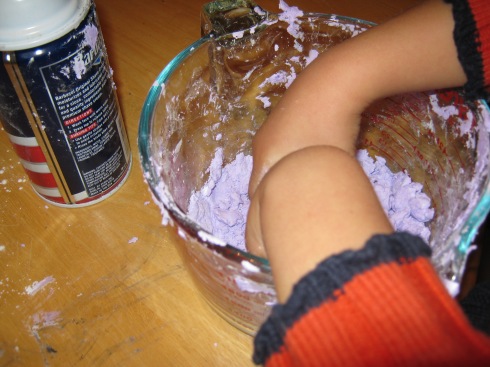
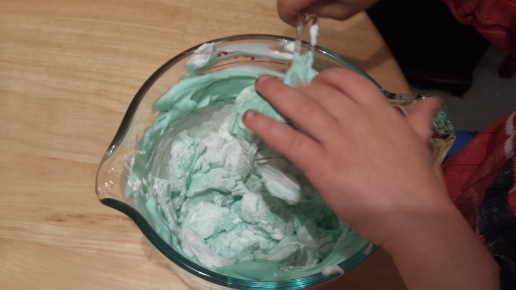
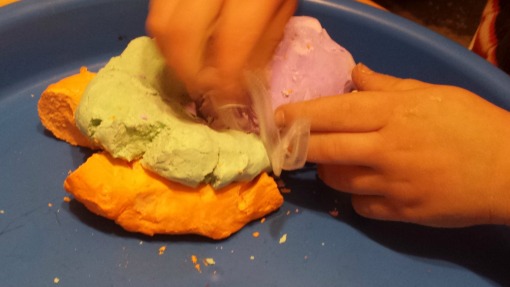
The dough should eventually begin to stick together into a puffy, foamy dough.  At one point we couldn’t resist anymore – in went the hands!

Halloween Foam Dough 026

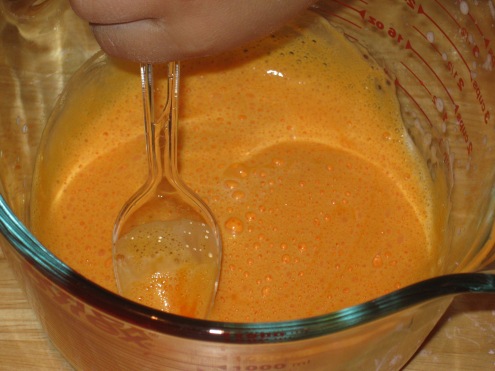
When your foam dough is the right consistency, set it aside and wash your bowls, spoons and hands in warm water.  We decided to make orange next.

Halloween Foam Dough 030

Cropped Orange Dough

For our last color we opened a new can of shaving cream.  What a difference we noticed!  Our green dough was a bit more puffy-fluffy since the shaving cream was more foamy.

Mummy Craft and Foam Dough 021

Mummy Craft and Foam Dough 026

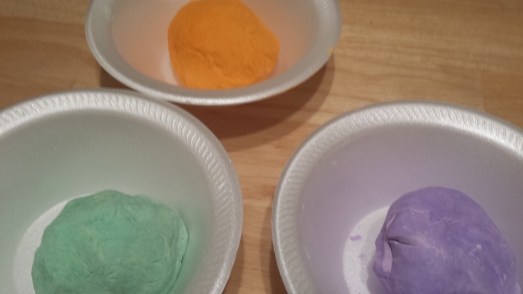
When all of your dough is complete – it’s time to play!

Mummy Craft and Foam Dough 033

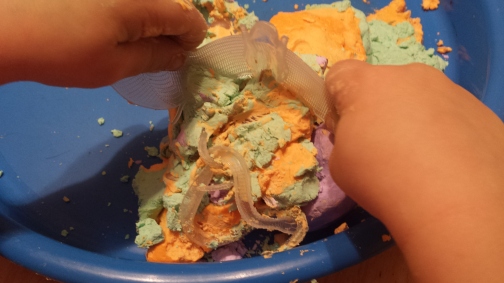
We got out out a small bin to contain the mess, and we added plastic creepy crawlies.  My son had fun poking the critters into the dough and making caves, but he was most delighted to mash the dough together.  This is not a dough that keeps, so have fun with it.  Mixing it up was a lot of messy fun – even Mom joined in.

Cropped Close up

Mummy Craft and Foam Dough 039

Mummy Craft and Foam Dough 040

I hope you enjoy this spooky, ploofy dough as much as we did!  It may not be for the crafty faint of heart, but if this neat freak mama can survive it, you will too.  🙂

K
Foam Dough Header

Masking Tape Mummy Craft

My son is obsessed with all things Halloween.  I’m not quite sure where or when it started, but we’ve been building ‘spooky castles’ out of blocks since March, and reading cute ghost and pumpkin stories ever since he could crawl to the book box and choose the book for story time.  We’ve re-enacted many an episode of Scooby Doo with the little set of figures I found at a garage sale and we’ve hunted for the ghosts we made out of twists of tissue and twine.

And the projects!  He hasn’t met a spooky craft he hasn’t loved, and we’ve had fun decorating our house with the results.  I’ve been compiling Halloween crafts and ideas all summer long, so when the first chilly fall morning greeted us, I was ready.

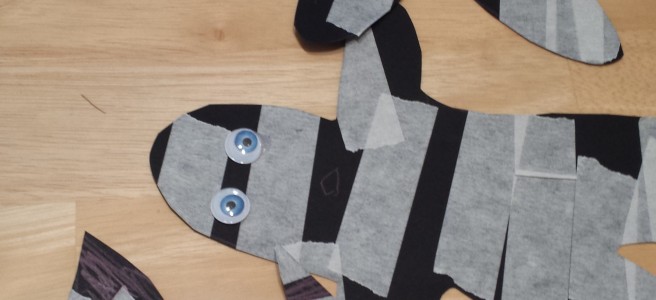
We decided to try our hand at this cute Masking Tape Mummy.  I had purchased a package of black card stock at the craft store with the intention of making paper bats, but when I found myself with an odd twenty minutes to fill before we left for work and Grandma’s house, this was a perfect fit.  This project is fast to set up, simple enough to modify for any age, and it promotes fine motor development for little hands.  Plus it doesn’t require special materials or skills and it looks great every time!

You can read the original instructions we used here.

What you will need:

  • Masking tape
  • Black card stock or construction paper  (Card stock is a bit sturdier, but any paper will do if you are in a hurry)
  • A light colored pencil or piece of chalk
  • Googly eyes
  • Glue
  • Scissors
  • Optional: hole punch and string, if you’d like to make a mummy bunting  🙂

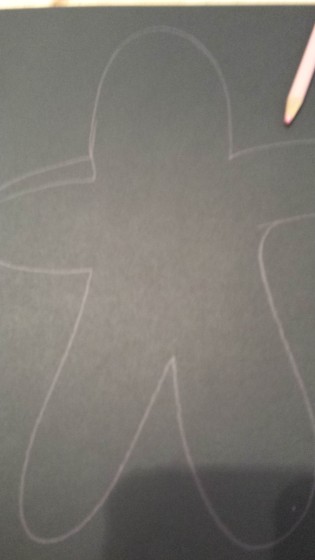
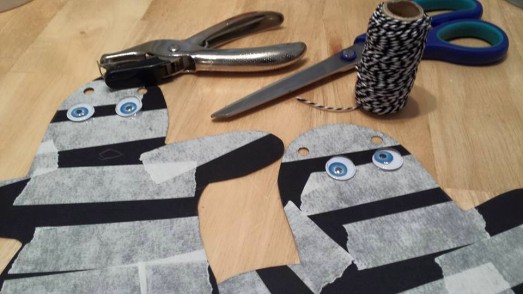
Start by free-handing the mummy’s body using your colored pencil or chalk.  Don’t stress too much about how it looks; think of the most basic gingerbread man type shape and just wing it.  You can see in this picture that I made one arm a bit too big, so I just drew a second line.  You will be cutting this guy out anyway, so no worries.

Oct. 2015 162

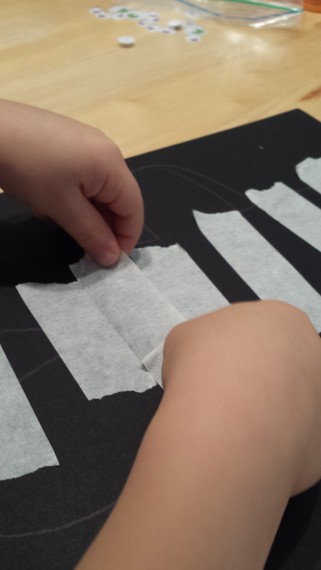
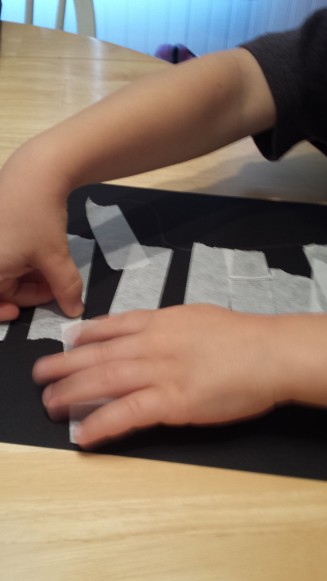
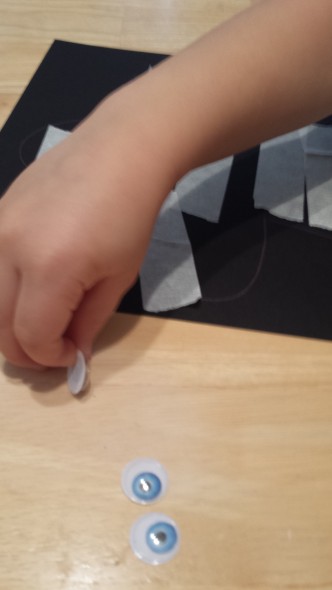
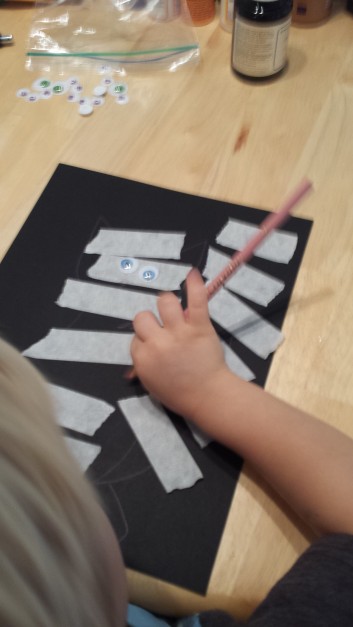
Next, start ripping your masking tape into little strips.  If your little one can do this step on their own, let them.  My son attempted to do this on his own while I sketched the mummy shape, but he just ended up with a wadded up ball of tape, so I ripped some tape strips for him and stuck them on the table.  I showed him how to place the strips and on the mummy shape and then let him get to it.  It’s okay if the tape goes outside the outline since again, you’ll be cutting your mummy out.  You may want to start sketching your second and third mummies at this point, since it didn’t take long to wrap our first mummy up.

Oct. 2015 167

Oct. 2015 169

After your mummy is wrapped up to your liking, cut it out with the scissors.  The first mummy we made was so covered in tape that I could no longer see the pencil lines, so I just cut it out in a mummy shape.  For the second one I asked him to leave some of the pencil lines showing, which made it a little easier to cut out.  You could also create a mummy shape template and then trace it onto the back of the card stock.  Do whatever works for you and your little one.

When you’ve finished cutting your mummy out, it’s time for googly eyes.  We found some fun ones with colored eyes at our dollar store, but any kind will look great.  Get out your glue and glue the eyes in place.  I used the hot glue gun because instant gratification, but if you’re in no particular rush, let your little one do the work.  Place the eyes where you want them first, then lift one up at a time and add a little blob of glue and then press the eye in place.  If you’re worried about mess, let them dab glue into place with a cotton swab and keep wet paper towels or a wipe handy.

Oct. 2015 170

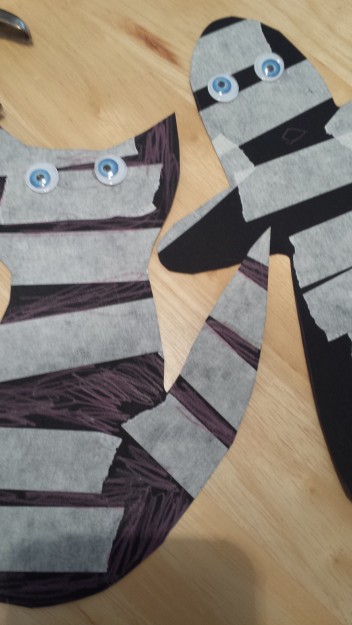
After we made a few mummies my son decided we needed to make a mummy cat.  I sketched out a kitty shape and he added the tape and some pink fur details.  I love when a project becomes the jumping off point for other ideas and creativity.

Oct. 2015 174

Oct. 2015 179

Oct. 2015 176

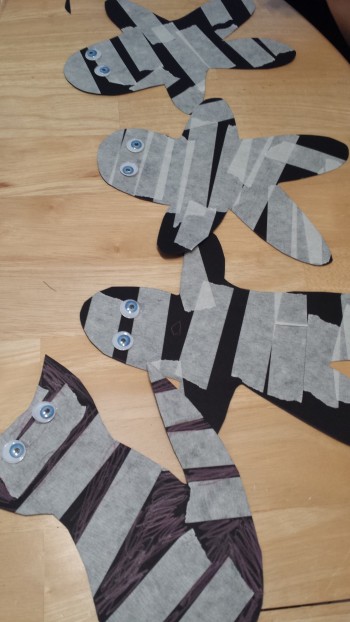
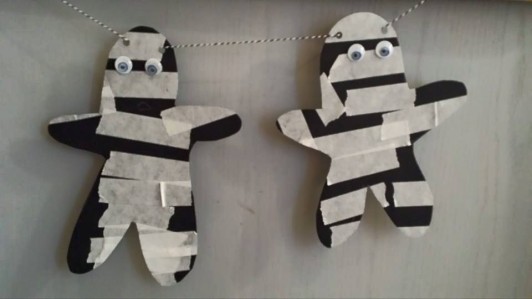
Now that you have a bunch of mummies, what to do with them?  We ended up giving a few away to friends and Grandma, so we only had two left.  I’m sure we’ll have more soon, since this craft was quite a hit.  Until then, I punched two holes close to the top of the mummy’s head and threaded them on a string to create a mini mummy bunting.  Mini mummy bunting – try saying that three times fast!

Oct. 2015 181

Oct. 2015 182

I hope you enjoy making your own masking tape mummies and coming up with fun ways to use them.  A mummy wreath?  A mummy card?  The possibilities are endless – and so spooky and sweet!

– K

Jumping In, Anyway

I’ve thought about writing a blog for a few years now.  My husband even suggested it off the cuff about a year ago.   I would constantly read blogs to look for ideas and inspiration for projects, and there was always that tiny, nagging thought as I perused postings and read through the anecdotes – I could do this too.

And as is the usual case with me, for quite some time I went back and forth in my mind, listing all the reasons I should:  I like writing!  It could be a fun and humorous way to document all our crafty triumphs (and bitter defeats).  I could share my ideas and engage in like-minded communities online.  I could salvage some of the usefulness of my education degree.  And who knows – it could even become profitable some day, or so the fairy tale of the self-published goes.

And of course, all the reasons I should not:  It’s going to take a commitment of time I may not have.  It might cost money to maintain a blog and our budget is tight.  I already get some static about being “that crafty mom” and I’m fairly certain I don’t want to tell people I’m an insufferable mommy blogger too.  I’m an old, and therefore a more privacy minded person who does not want to share my actual family doings, just our crafty adventures.  I take lousy pictures.  So on and so on.

And yet, here I am, jumping in feet first anyway.  Anyway.  That’s kind of  magic word for me these days.  It means I can try something new despite my fears.  It means I can do things on my own terms.  It means that despite the myriad reasons piling up under the NO column, I’m going to try anyway.

You know those blogs.  The ones where everything is all soft pastels and gold tones, where the pictures are absolutely perfect looking, photo-shoot quality shots, where the houses are spotless modern marvels of design, where the projects look utterly perfect at every step, where everything is twee and charming and delightful and perfect and the kids are perfect in their pleated dresses and chinos and have names like Peyton and Ayyydyn and McKalylynyn?

Yeah.  That’s not what this is, not by a long shot.  Or going to be, at least.  One post does not a blog make.  But I’m excited to jump in, feet first.  I’ve already got a few ideas knocking around in my head that I am excited to share, even if everything isn’t perfect.  Anyway.  I’m going to try.  What’s the worst that could happen?  Wait – don’t answer that.

So welcome.  Grab a cup of coffee with me.  I have a rule around here that Mom doesn’t do diddly until she’s had at LEAST one cup.  But hey, after coffee life is good and there’s fun to be had.  Anyway, let’s make some stuff!

  • K