

This is another recipe/project that originated when I was wandering around a craft store, as I do. I noticed this candy mold in the Halloween bake-ware section:

Immediately the wheels started to turn – I had a coffin shaped cookie cutter at home and three half-full bags of colored candy melts leftover from last year. I bought the mold and went home to do a little research on creating the zombie brownies pictured. You can find the original project here. It’s a pretty bare bones (ha ha groan) set of instructions, so I decided not only to try it out but to also put my own spin on it.
This is another project that requires some simple prep work and a few special supplies. In other words, not a great last minute project. (If you need a last minute fix, check out the ghost marshmallows at the end of my donut tutorial here) But if you have a day or two to complete this and some time to assemble your supplies, the end results are pretty awesome. I have also included some simple variations, so read through and decide what works for you.
What you will need:
- Skeleton candy mold (from craft store or online)
- Colored melting candy wafers in color(s) of your choice
- Brownie mix
- Chocolate frosting (store bought or homemade if you’re a maniac)
- Icing/decorator bags or plastic baggies
- Coffin shaped cookie cutter or coffin shaped bake pan
- Microwave safe bowl, spoons, spatula, tall glass
- Optional: red gel icing, gummy critters and Halloween candies, Thriller music set on repeat
To begin, mold your candies. You will want all your candy prepared ahead of time to simplify the assembly of the brownies. If you don’t have time (or don’t want to bother) to mold candy skeletons, skip this step and check out the gummy candy options at the end of this post to complete your creepy treat.

I tested a few different methods for melting and piping the melted candy into the mold, and I ultimately decided to use the icing/decorator bags from my Halloween donut tutorial. I initially tried adding the melted candy to different kinds of squeeze bottles, but I found that this method inevitably led to air bubbles in the molds and a lot of wasted candy. I found that piping the melted candy from the bag meant a smooth flow into the mold with no air bubbles.
I did learn a cool trick about squeeze bottles though: To remove melted candy from the inside of the bottle, place the squeeze bottle in the freezer for ten to twenty minutes, or until the candy is hardened. Then simply squeeze the bottle to break up the hardened candy and shake it out.
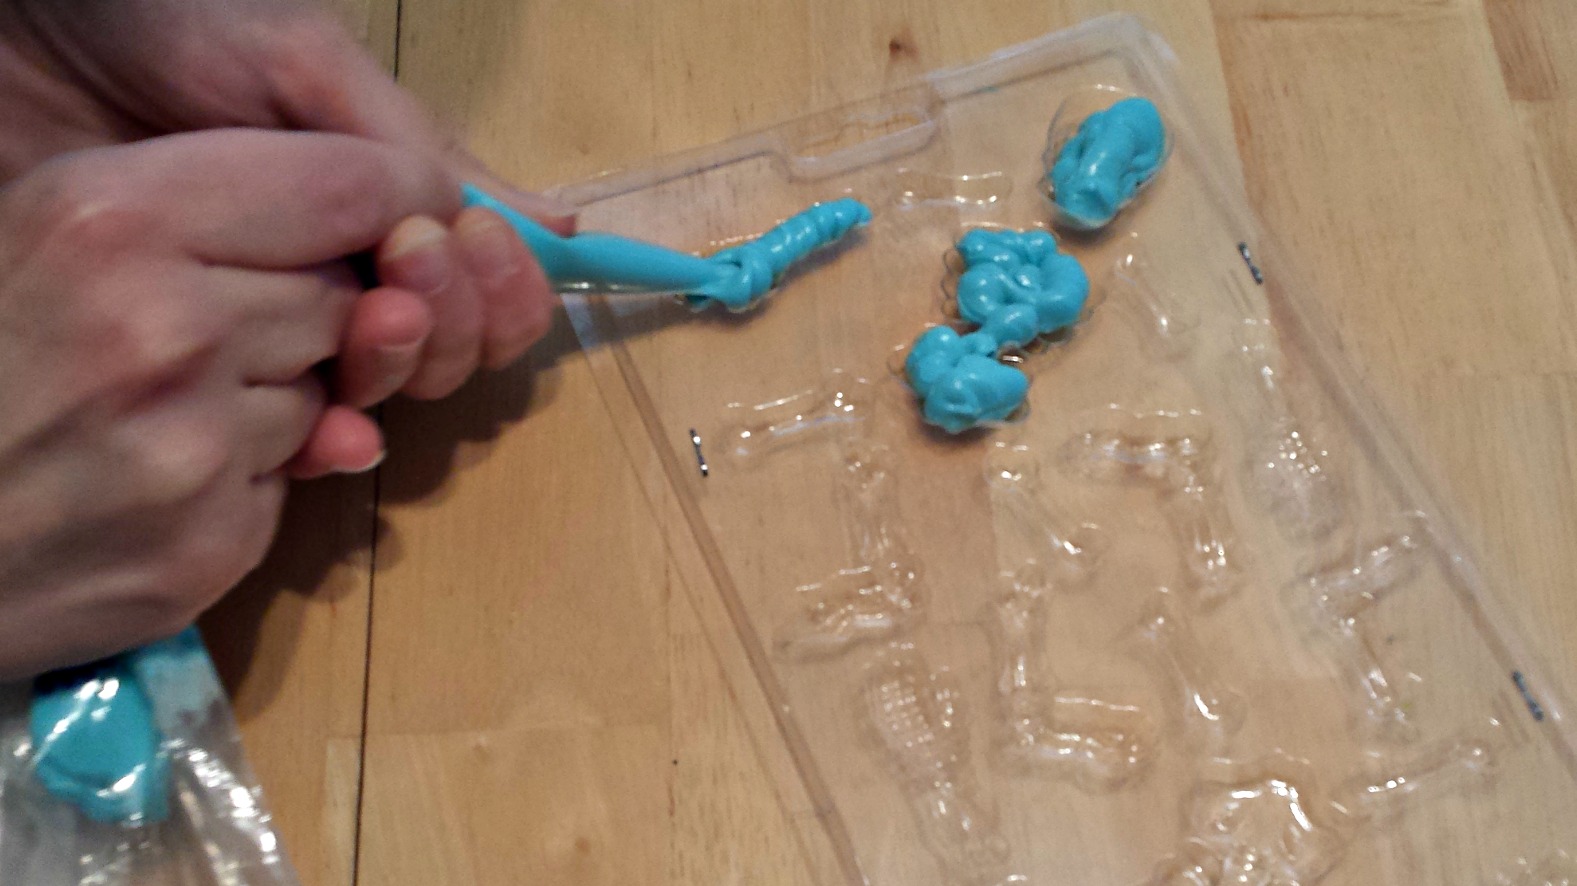
Prep your bag by placing in inside a tall glass, with the pointed end down in the glass. Roll the edges of the bag down over the sides of the glass.

I use my microwave to melt the candy wafers. You can also melt them using a double boiler method, and there are warmers you can purchase to safely melt the wafers. Do not melt the candy wafers over direct heat, as they will scorch and become unusable.
I broke the wafers into smaller pieces and placed them in my microwave-safe glass bowl. I mircowaved the wafers for one minute on 50% power. Take the wafers out, stir, and repeat until they are completely melted. Then, using a spoon and spatula, scoop the melted candy into your prepared icing bag.

Give the melted candy a minute to cool, then twist the open end of the bag and snip off the tip of the bag. Begin piping the candy into the mold cavities. Don’t worry too much about filling the mold exactly – when the shapes are mostly filled, give the mold a few gentle taps on the counter top. This will help dislodge any air trapped in the cavities, and help the melted candy settle into the mold. Place the mold in the freezer for about 15 to 20 minutes.
To unmold the candy, place a clean towel on your counter and set the mold on top of it. Gently tap the mold until the pieces fall out. Be gentle with the mold; I have found that the brittle plastic can break and splinter if handled roughly. If some pieces are stuck, rub your thumb back and forth over the top of the mold – sometimes a little heat will help it dislodge.

Repeat this process as many times as you like until you have an assortment of candy skeletons to use.
Now it’s time to make the brownie coffins – wow, there’s a sentence I never thought I’d write! I have tested two methods for doing this, and there are some pros and cons for both.
Method 1 – Cookie Cutter
This was my original plan – make a batch of brownies as usual and then use a coffin shaped cookie cutter to cut the brownies. Prepare your brownies and when they have completely cooled, use your cookie cutter to cut them into coffin shapes. Use a butter knife or small spatula to gently lift the brownies out of the pan.

My pan was smaller so my brownies came out quite thick. I decided to try to cut them in half. This was sort of successful – some of the brownies cut neatly in half but a few crumbled and had to be eaten (tragedy!) If you decide to try this, use a sharp serrated knife and go slow.
On the pro side of the cookie cutter method, you have lots of leftover brownie bits to nibble on. Save some, if you can, for the top of your coffins, to look like gobs of dirt. You can also let your family, who have probably been whining about how good the brownies smell, eat some. If you want. Muahaha. Another pro is that this is an inexpensive approach – the cookie cutter cost 99 cents. A con for the cookie cutter method would be that this is a pretty messy process.
Method 2: Coffin Bake Pan
I purchased this cool Wilton coffin bake pan on clearance at the last minute, so of course I had to test it. This pan makes six LARGE sized brownies, so this is almost a dessert treat to share with two or more people. The pan creates brownies with a kind of inner shell that you can fill with the frosting or filling of your choice.
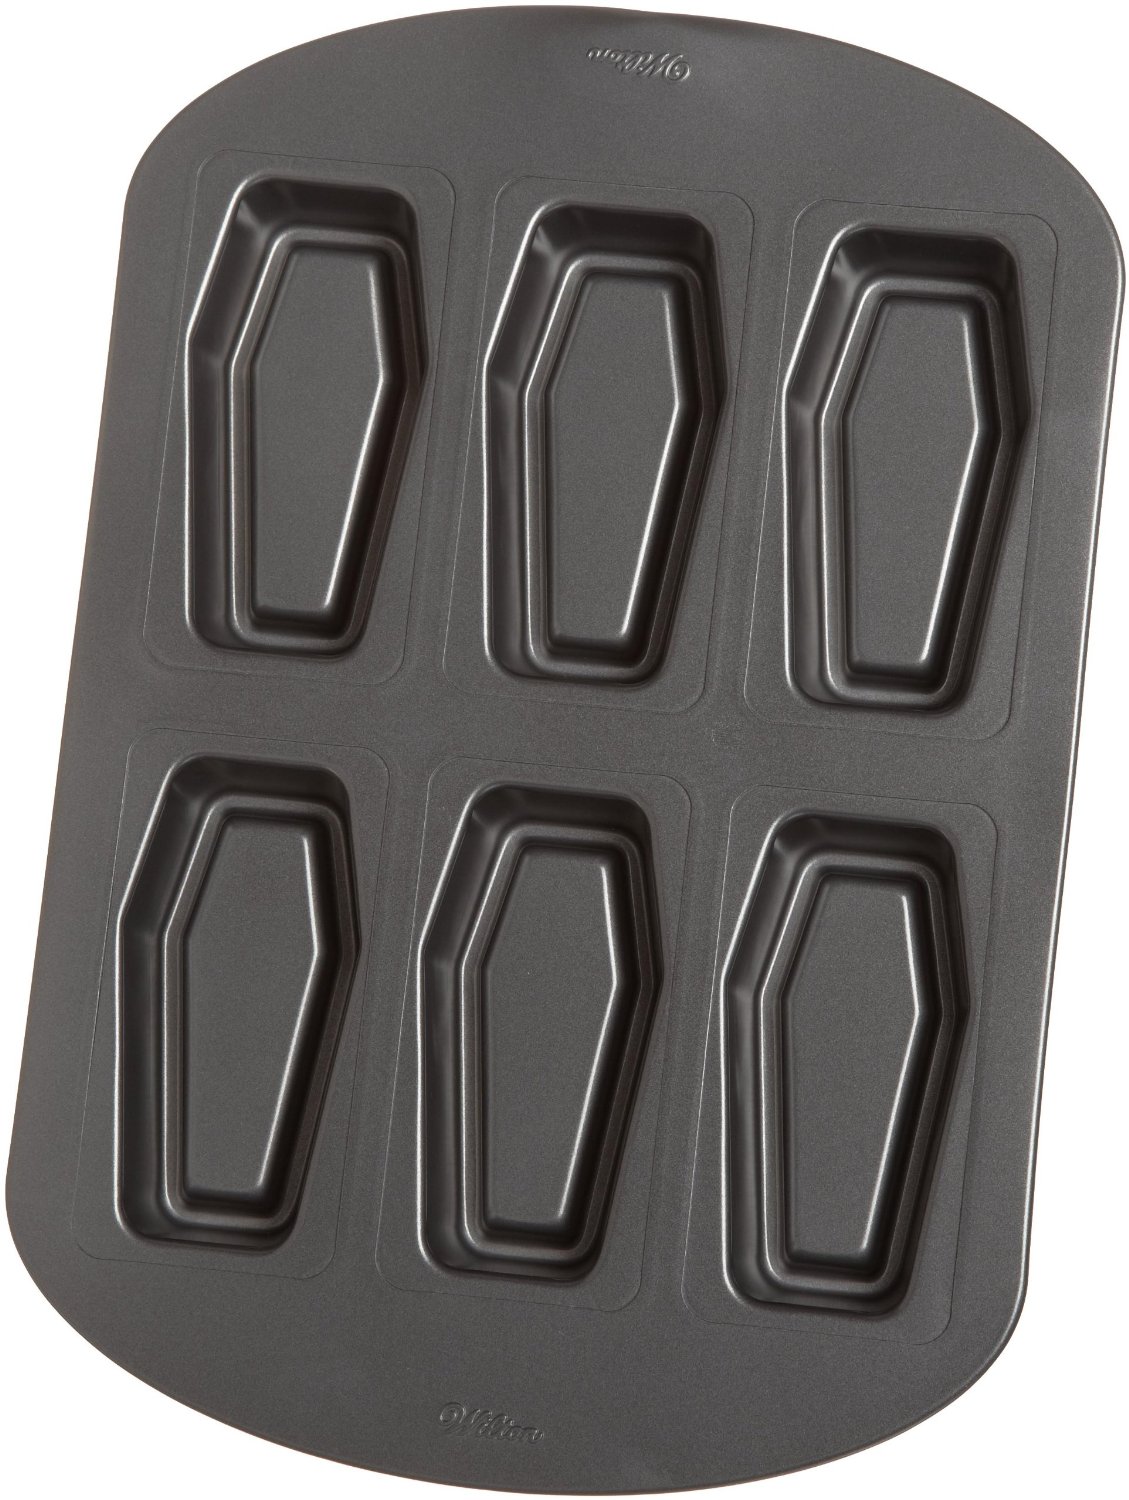
Give your pan a light spritz of cooking spray and bake your brownies at 350 degrees for about 25 minutes. Invert the pan over a cooling rack and genty tap until the brownie coffins pop out. Let them cool completely before decorating.
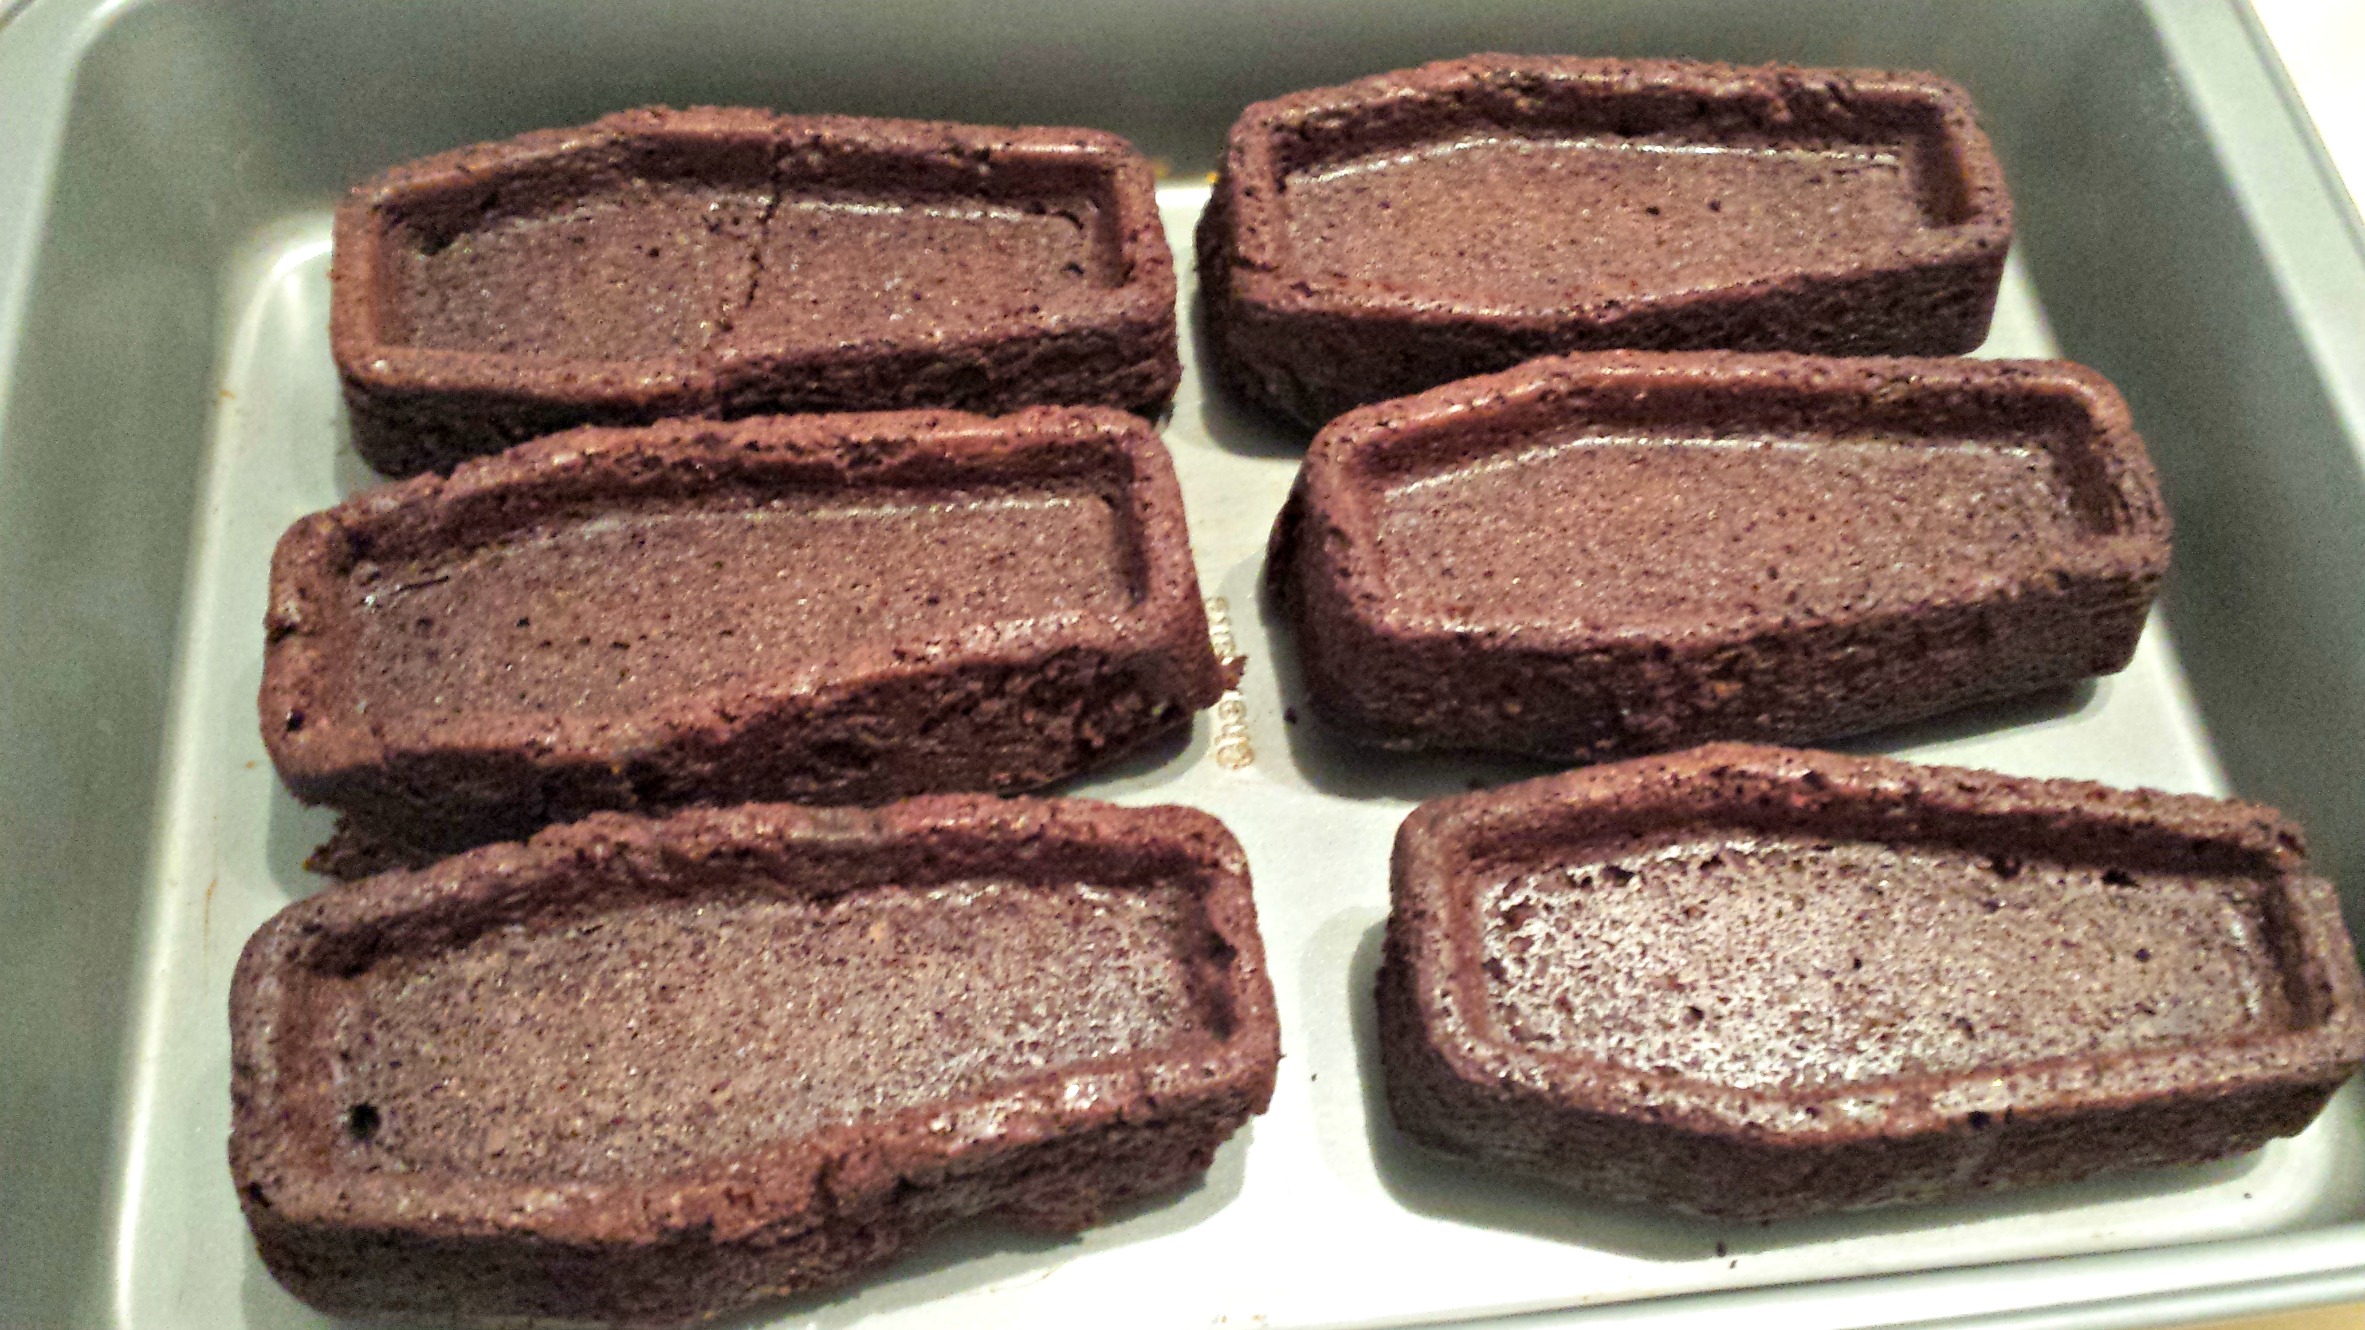
I told you – these things are huge! A pro for the bake pan is that this process is much simpler and less messy. A con, however, is that there are no extra brownie pieces to use for the tops of the coffins. You could sacrifice one of your coffins to crumble up – and also to snack on. Another potential con for the bake pan would be the price – I managed to purchase this on clearance for $5.00, but it normally retails for more.
Now the most fun part – decorating! Whichever methods you used, you should now have some coffin shaped brownies, some candy pieces and some chocolate frosting. First, add a layer of chocolate frosting to your brownies.

If you check out your grocery store’s bulk section you can find some fun candies to decorate your coffins. I chose gummy brains, gummy witch hats, gummy worms (a classic!) and some of those weird candy pumpkins that always materialize during Halloween, but no one seems to actually like. I also got out my red icing gel.

Next, add your candy pieces. I put our skeletons in first, then added some of the reserved crumbled brownie pieces to the top to look like dirt.

I also added some red icing gel to get that extra creepy, undead look.

My son had fun sticking the gummy candies into the coffins. Remember to add some crumbled brownie bits to create that fresh-from-the-grave look. Delicious!

This was a fun recipe with some pretty decadent results. Zombies are still pretty hot right now, so bring these to your next Walking Dead premiere or other zombie-themed event and steal the show. And if you try the methods outlined above, I’d love to hear how it goes!
K

